







How to Draw a Bald Eagle Head (Cartoon) VIDEO & Step-by-Step Pictures
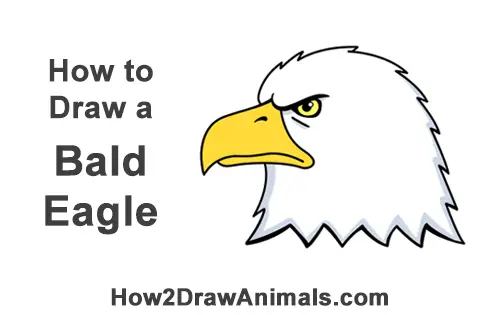
Please PAUSE the "How to Draw a Bald Eagle Head (Cartoon)" video after each step to draw at your own pace.
Written step-by-step video tutorial:
For the first few steps, don't press down too hard with your pencil. Use light, smooth strokes to begin.
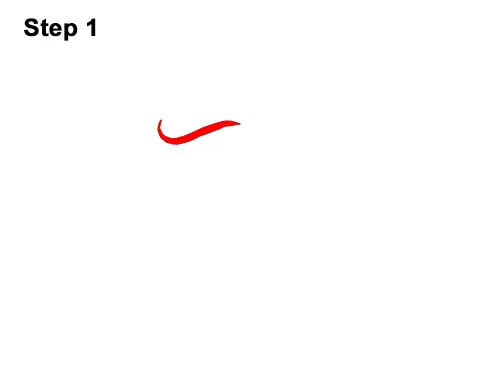
Step 1: Draw a sloping line that curves up on the left side for the eagle's eyebrow. Sketch lightly at first. When you get the shape right, darken the line. Make the line for the eyebrow thicker and darker.
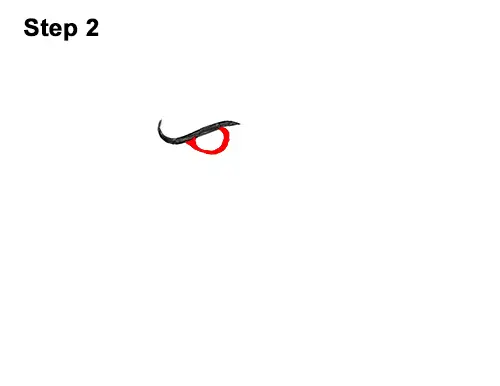
Step 2: Under the eyebrow, draw a half-circle for the eagle's eye. Make the outline of the eye thick so that it stands out. Add a bit of extra shading on the left side to make the eye pointier.
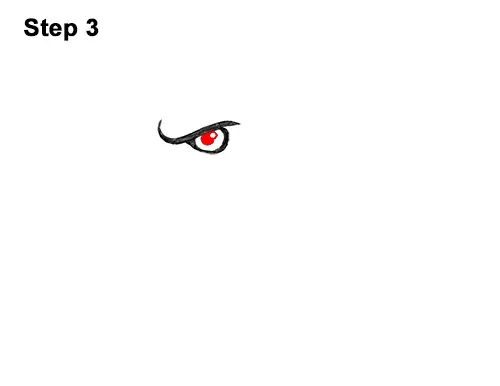
Step 3: Inside the eye, draw a tiny circle to represent glare. In the middle of the eagle's eye, draw a big dot for the pupil. Draw the pupil big enough so that the top touches the eyebrow.
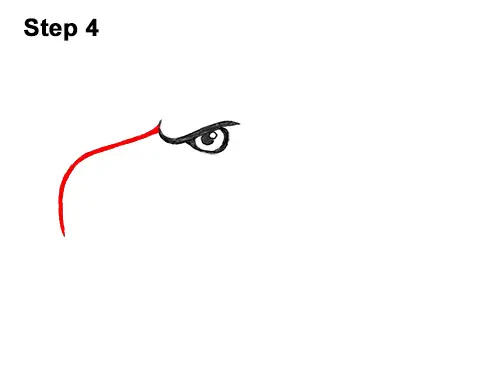
Step 4: Starting at the eyebrow, draw a long, curved line for the top part of the beak. This line should stretch to the left and then curve downward. The longer you make this line, the bigger the eagle's beak will be.
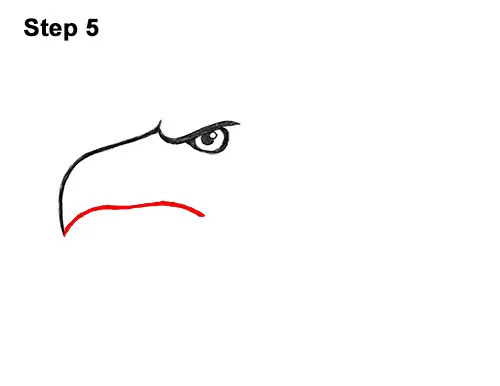
Step 5: Continue drawing that same line toward the left to create the eagle's mouth. Curve it so that it creates a sharp, pointy tip on the left side. Make it a bit wavy in the middle. It should stretch right as far as the eye.
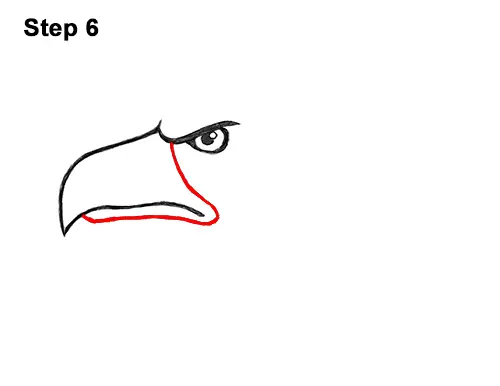
Step 6: Starting under the eyebrow, draw a long, curved line for the rest of the eagle's beak. Draw the line downward and then make it curve and wrap around the mouth. The bottom part of the beak should be thin. It's basically a long, horizontal line.
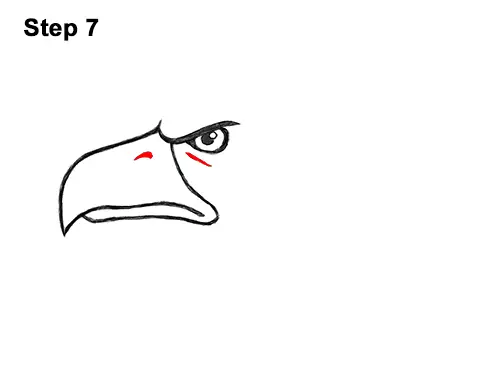
Step 7: Inside the beak, near the top, draw a short line for the eagle's nostril. Draw a small line under the eye too.
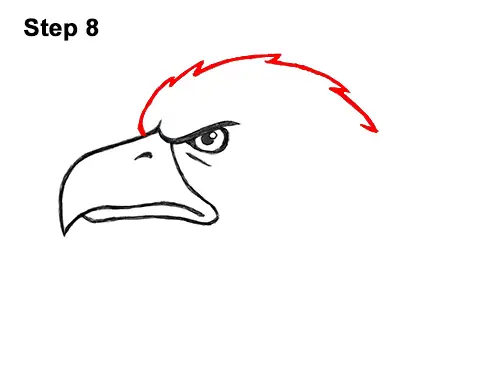
Step 8: Starting at the top of the beak, near the eyebrow, draw a long, curved line for the head. Don't draw the line too high up or the head will be too big. Keep it pretty close to the eye. When you get the shape and size of the line right, darken it. As you darken the line, draw a few jagged points along the way for the eagle's feathers. You can skip the jagged points and make the line smooth. Pay attention to how far to the right the line goes. It doesn't end close to the eye.
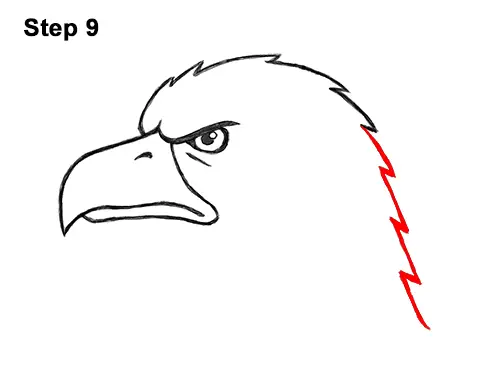
Step 9: On the right side, lightly sketch a sloping, vertical line for the back of the head/neck. When you get the line right, darken it using a series jagged points for the eagle's feathers.
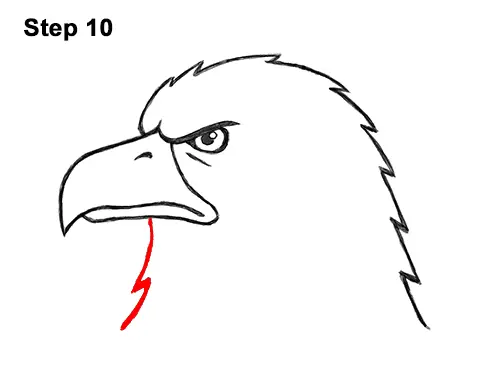
Step 10: On the left side, under the beak, draw a jagged, vertical line for the eagle's throat.
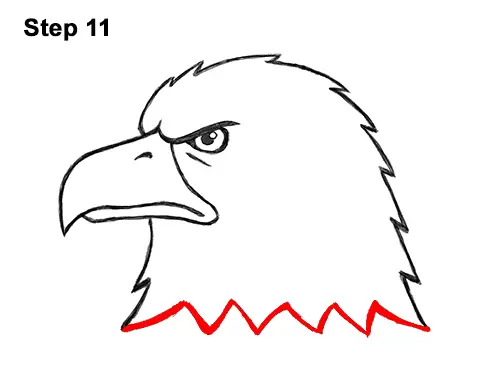
Step 11: Draw a series of angled lines along the bottom to complete the shape of the eagle's head. The bottom should be a row of lines similar to the letter V. You can draw these V-shaped lines bigger or smaller if you'd like.
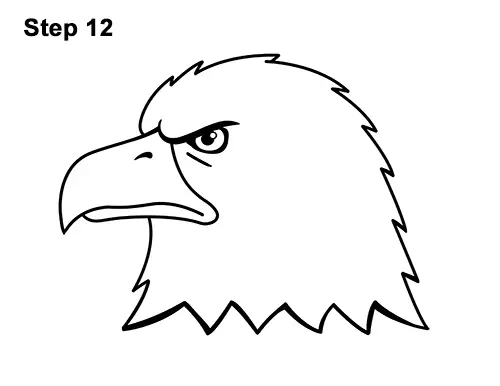
Step 12: Using a pen or marker, carefully go over the lines to make your drawing permanent. After inking, get rid of every pencil mark with an eraser.
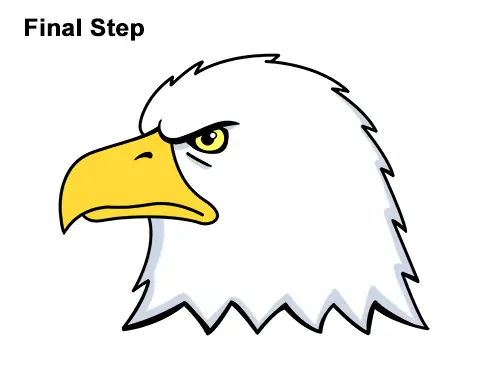
Final Step: Color your eagle drawing using color pencils, markers or crayons! Blend yellow- orange and yellow for the beak. Color the eye yellow but don't color the tiny glare circle. Use a bit of gray on the sides and bottom for shadows. You can also color the whole head brown for a golden eagle. Don't forget to pause to draw at your own pace.
Thanks for watching! Subscribe to the How2DrawAnimals YouTube Channel for a new tutorial every week.
To learn how to draw popular cartoon characters, visit EasyDrawingTutorials.com.
RELATED TUTORIALS
 |
 |
 |