Page 2 of 4
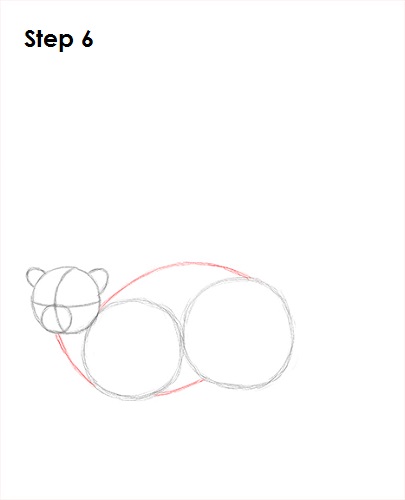
Step 6: Draw a series of lines that connect the major shapes to form the lemur's body. The line on top should bend more because of the lemur's arched back.
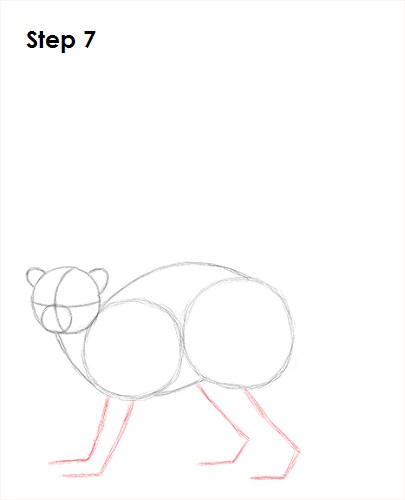
Step 7: Draw four lines under the body (two below each circle) as guides for the legs. Bend the lines forward at the tip as a guide for the lemur's hands. The lines in the back are bent in two places to indicate where the joints will be.
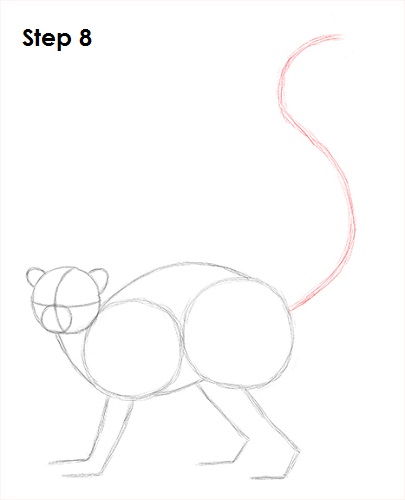
Step 8: Draw a long curved line similar to the letter S on the right side as a guide for the lemur's tail.
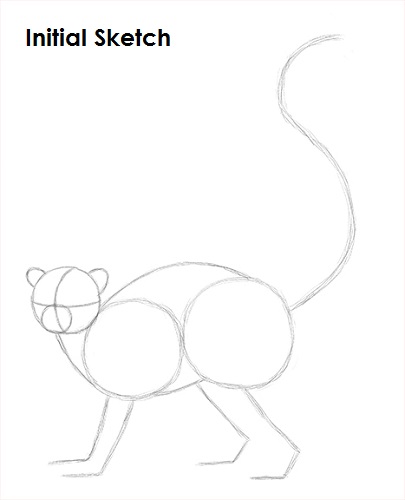
That's it for the initial sketch! From this point on, press harder with your pencil to get a more defined sketch.
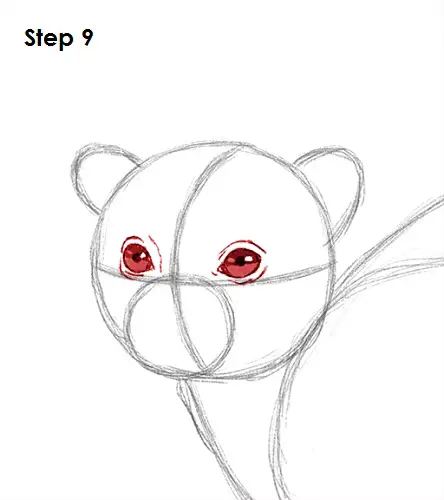
Step 9: Draw the eyes inside the lemur's head using the lines as guides for placement. First lightly sketch two ovals. Then darken the lines for the outline of the eyes and make the ends pointier. Draw small lines inside the eye shapes for the actual eyeballs and add a tiny circle inside each eye to represent glare. Draw a small dot in the middle of each eye for pupils. Shade in the rest of the eyes except for the tiny circle that represents glare. When you shade the lemur's eyes, use a value that's lighter than the pupils. Draw a few lines around the eyes for extra detail.


