Page 4 of 4


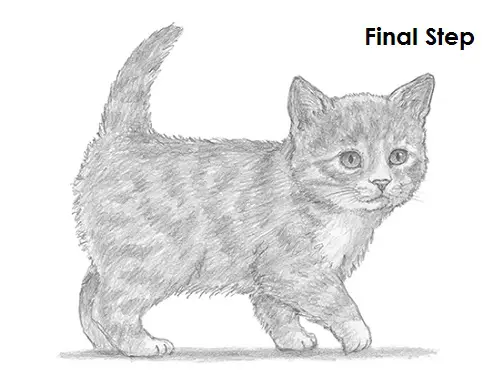
Add a cast shadow underneath. This helps ground the kitten so it doesn't appear to be floating.
You can stop here for a white kitty or you can add more value throughout your drawing for extra detail. Cats' coats come in a wide variety of colors and patterns that include spots and stripes. It's up to you to decide what your kitty will look like! For a tabby pattern like this, add a series of short stripes throughout the body by shifting the pressure on your pencil to get different tonal values. You can also add a solid value to the kitten's entire body for a simpler drawing. Add the value using strokes that go in the general direction of the fur. Otherwise, be patient as you add the coat pattern because it can be very time-consuming. It's always a good idea to use reference to accurately draw the coat pattern you want. If you have a kitty, try to replicate its coat pattern on your drawing! Don't forget to pause the "How to Draw a Kitten" video any time you need help.
Thanks for watching! Subscribe to the How2DrawAnimals YouTube Channel for a new tutorial every Tuesday.
To learn how to draw popular cartoon characters, visit EasyDrawingTutorials.com.


