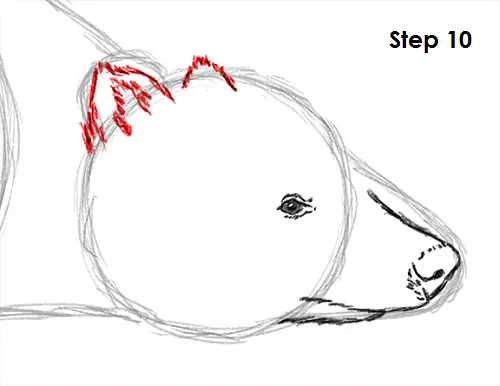
Step 10: Use the smaller arc as a guide to draw the badger's ears. Use quick, short strokes for a furry look and make them pointier. Draw some fur inside the ears, too, and the other ear on the other side.
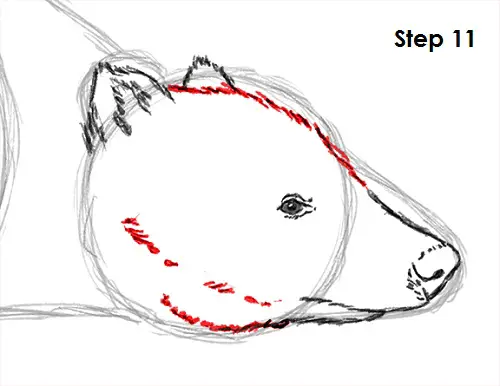
Step 11: Use the original circle as a guide to draw the rest of the badger's head. Use short strokes on top and longer strokes on the bottom to get different lengths of fur.
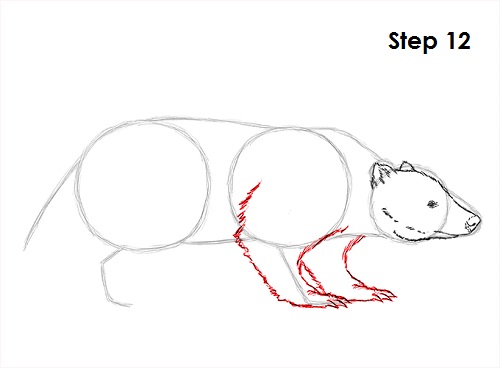
Step 12: Use the line as a guide to draw the badger's front legs. Draw lightly at first to get the structure right. When you're happy with what you have, go ahead and darken it. Badgers have short, powerful legs for digging, so make them thicker on top and draw a few curved lines at the end for the badger's long claws. Draw the leg on the other side the same way. Notice how only three of the five toes are visible on each leg because of the angle.
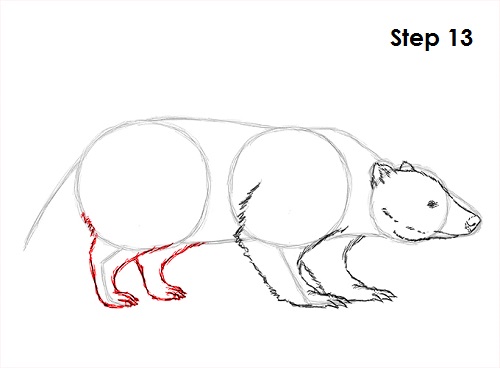
Step 13: Use the other line as a guide to draw the hind legs the same way as the front legs. Remember to draw the leg lightly at first, then darken it when you have the structure right. Draw around the guide line and make the leg thicker. Draw a few curved lines at the end for the badger's claws. Now draw the leg on the other side using the same technique.
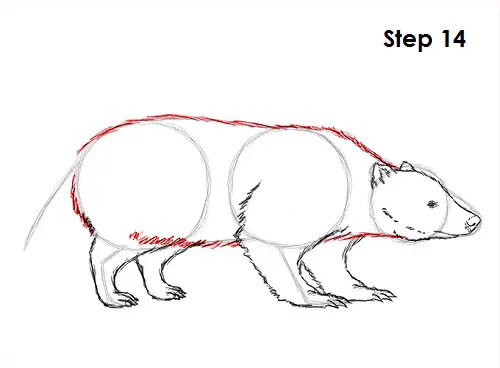
Step 14: Use quick, short strokes to darken the remaining lines and form the badger's body. Use longer strokes on the bottom to represent the longer belly fur.


