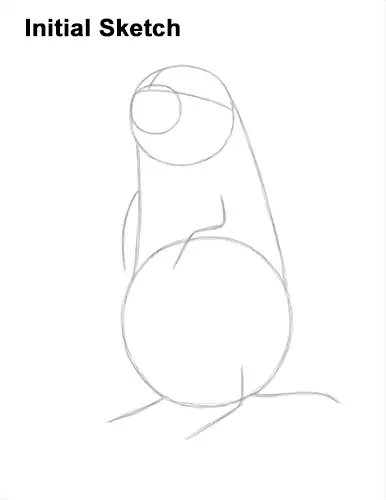
That's it for the guides! From this point on, press down harder with your pencil for a more defined drawing.
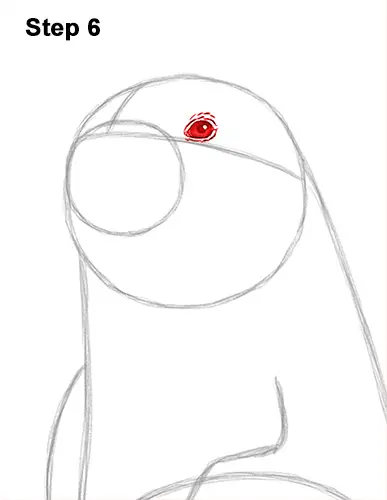
Step 6: Inside the head, on top of the horizontal construction guide, lightly sketch a small circle for the prairie dog's eye. When you get the size and position of the eye right, darken the shape but make the sides wider and pointier. Inside the eye, off to the side draw a tiny circle for a highlight. In the middle of the eye, draw a big dot for the pupil. Shade the eye but don't overlap the tiny highlight circle as you shade. Add a few small, curved lines around the rodent's eye for a bit of the bare skin and fur.
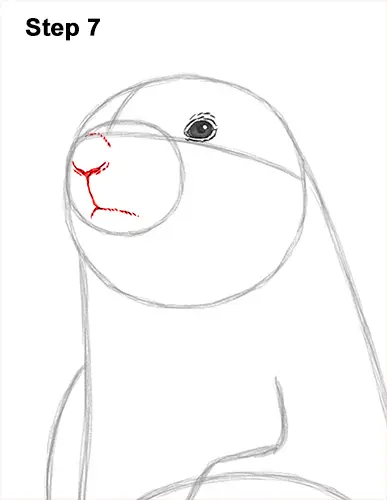
Step 7: Inside the muzzle, near the left edge, draw a small, V-shaped line for the prairie dog's nose. Make the shape thicker at the bottom for the nostrils. Under the nose, draw a line that splits into two for the mouth. Use short strokes to draw the mouth for a furry texture. The left side of the mouth should be shorter than the right. Add a few short strokes above the nose for fur.
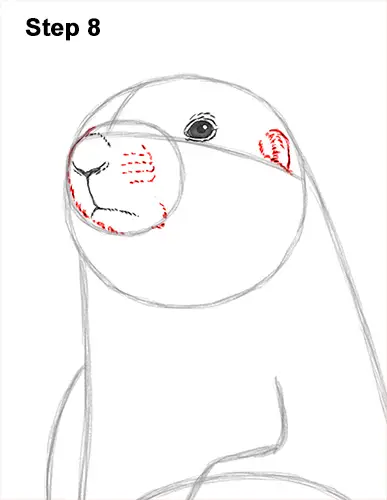
Step 8: Darken the left edge of the small initial circle using short strokes to create the side of the prairie dog's muzzle. To the right of the nose, draw a few rows of dots for the base of the whiskers. To the left of the eye, draw a short, curved line for the ear. Add a few short strokes under the ear and to the right of it for the fur that surrounds it.
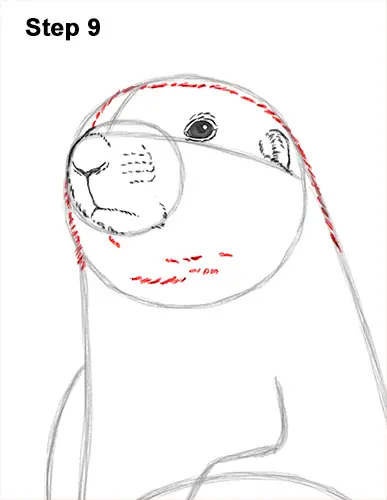
Step 9: Use the first circle as a guide to draw the rest of the prairie dog's head. Draw a series of short strokes along the basic path of the circle to create the shape of the head. Make the top of the head flatter than the circle. Below the muzzle, add a few short strokes to emphasize the fur on the neck.


