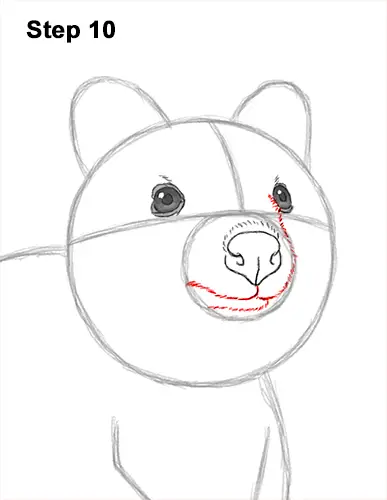
Step 10: Below the nose, lightly sketch a line that curves to the left for the first part of the mouth. Draw another line that curves to the right for the other half of the mouth. Follow the edge of the initial circle as you draw the outside of the muzzle. Curve the line toward the eye. Darken the left side of the mouth upward toward the edge of the circle to create the famous quokka smile. Below the mouth, draw a short line that's made up of short strokes for the furry chin.
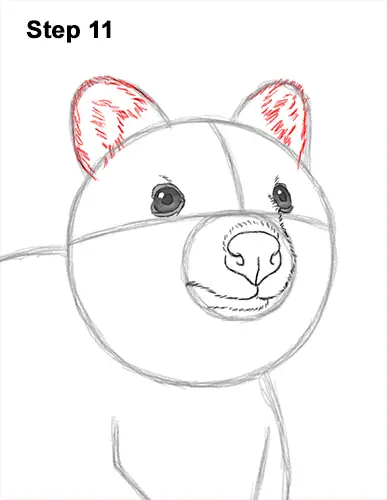
Step 11: Darken the arc on the top, left side of the head to create the first ear. Draw a few curved lines along the inner edge of the arc to give the ear more structure. Draw a series of short strokes within the arc for the fur that's inside the ear. Use the arc on the left as a guide to draw the quokka's other ear the same way. Darken the arc and add strokes inside.
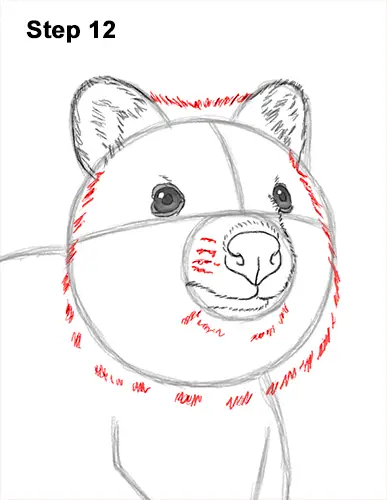
Step 12: Use the initial circle as a guide to draw the rest of the quokka's head. Draw a line made up of short strokes between the ears, above the edge of the circle for the top of the head. Draw a series of short strokes along the sides of the initial circle for the furry head. Draw the bottom part of the head below the edge of the initial circle to make the head longer. Leave a few gaps along the bottom edge to indicate where the head connects to the body. Draw a few short strokes inside the quokka's head to emphasize the fur.
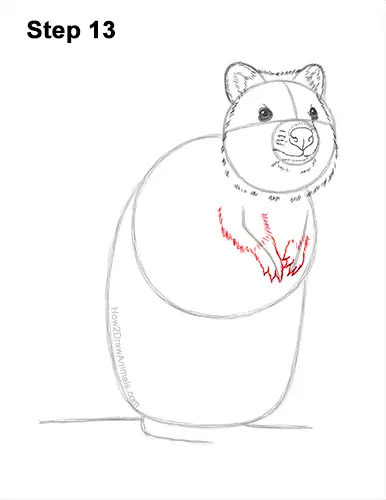
Step 13: Use the line inside the big circle, to the left, as a guide to draw the quokka's first arm. Follow the path of the guide and lightly sketch the shape of the arm around it. Use a series of short strokes as you darken the shape of the arm for the fur. Use smooth lines for the bottom part of the hands and digits. Along the bottom of the shape, draw a series of short, V-shaped lines for the digits. Use the line on the right as a guide to draw the other arm the same way. Add the V-shaped digits at the bottom. Draw short strokes around the guide to create the shape of the quokka's furry arm.
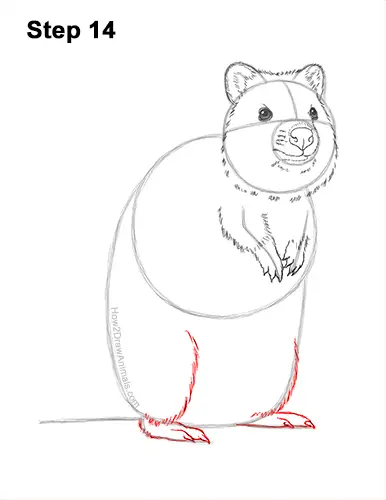
Step 14: Use the angled line on the lower, left side of the body as a guide to draw the first leg. Darken the guide line and on the right side, draw two thin, long shapes for two of the three toes. At the tip of each toe, draw a small, curved, triangular shape for the quokka's claws. Above the foot, draw a line that's made up of short strokes that curves up for the top part of the leg. Use the line on the right as a guide to draw the other leg the same way. Draw two thin, long shapes for the toes. At the tip of each toe, draw a small, triangular shape for claws.


