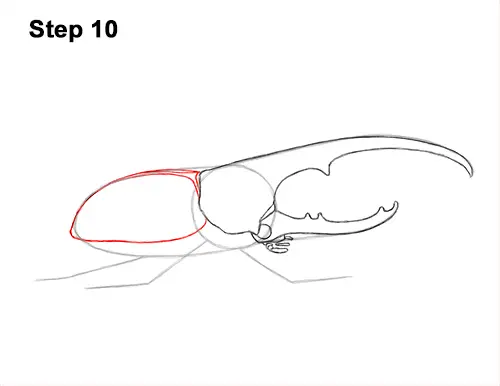
Step 10: Use the arc on the left side as a guide to draw the elytron (the wing cover) over the Hercules beetle's abdomen. Darken the top part and extend the left side a little. Lightly sketch a line in the middle for the bottom of the elytron. Make the line a bit wavy. The line should be close to the bottom of the arc. The right tip should curve up a bit. Draw a couple of lines at the top of the elytron for a bit of the visible pattern. Sketch lightly at first to get the pattern on this rhinoceros beetle right. Only a small amount of the pattern will be visible from this angle.
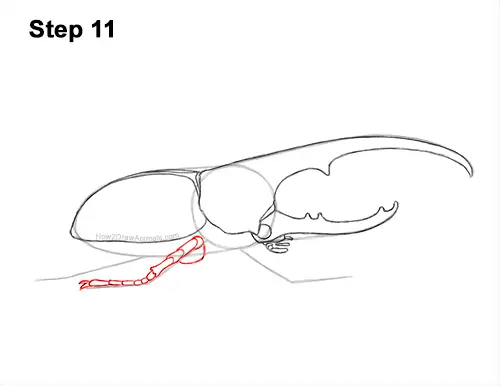
Step 11: Draw a sloping line near the middle leg to create a thicker cylindrical shape for the leg. Inside the shape, draw a few short, curved lines to separate the Hercules beetle's leg's segments. On the tip of the leg, on the left side, draw two tiny, angled lines for the claws at the end of the beetle's leg. Using short, curved lines, draw a thinner row of segments between the claw and the top of the leg. Draw a curved line at the top for the wide base of the leg that connects to the thorax.
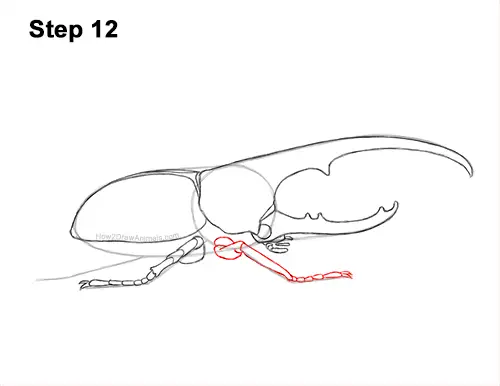
Step 12: Use the angled line on the right as a guide to draw the front leg in a similar way. Make the top part of the leg thicker. Use shorter lines along the bottom half to create separate segments. At the end of the leg, draw a couple of tiny angled lines for the Hercules beetle's claws. At the top of the leg, draw a couple of curved lines for the segments that connect to the thorax.
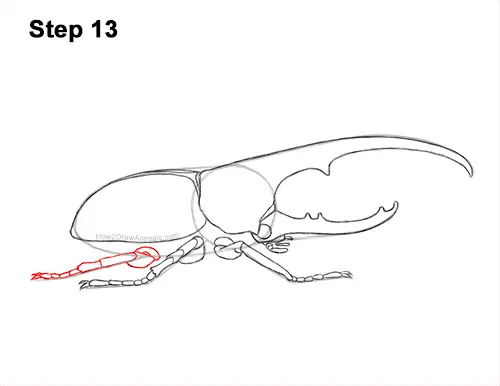
Step 13: Use the line on the left as a guide to draw the back leg the same way. Make the top of the leg thicker and add the segments along the lower half of the leg. Don't forget the claw! At the top, draw a series of short, curved lines for the base of the Hercules beetle's leg.
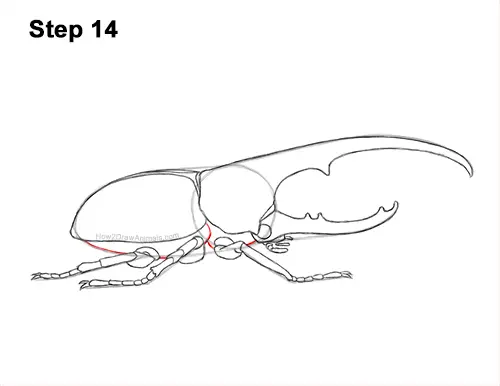
Step 14: Darken the lower part of the initial arc to create the rest of the abdomen. Draw a few lines on the right for the bottom of the Hercules beetle's thorax too. Don't overlap the legs as you draw these lines.


