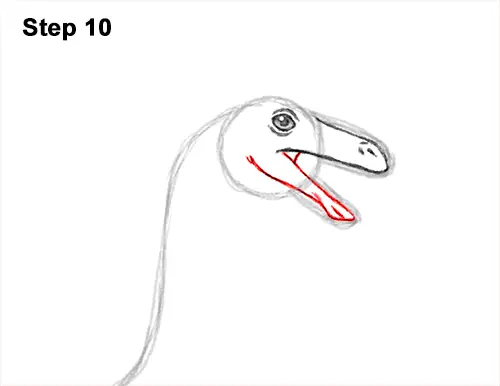
Step 10: Use the arc on the bottom as a guide to draw the lower jaw the same way. Darken the arc but make sure this shape is thinner than the top part of the muzzle. Extend the bottom line inside the head (farther left than the eye) and then curve it up to create the Gallimimus' jaw. Draw a short line in the corner of the mouth for the skin that connects the jaws.
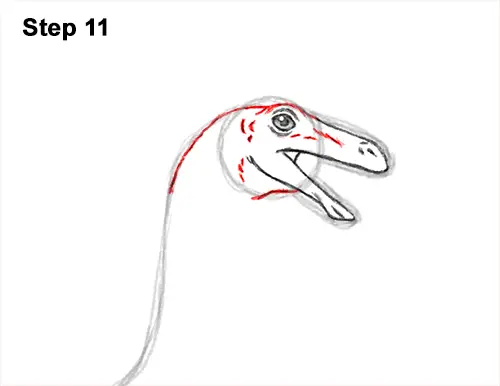
Step 11: Darken the top part of the initial circle for the head. Add an extra curved line over the eye for the brow. Darken the top edge of the circle and continue to darken the top of the guide line on the left for the rest of the Gallimimus dinosaur's head. Add a line under the jaw for the skin on the throat. Add shorter lines inside the shape to give the head structure.
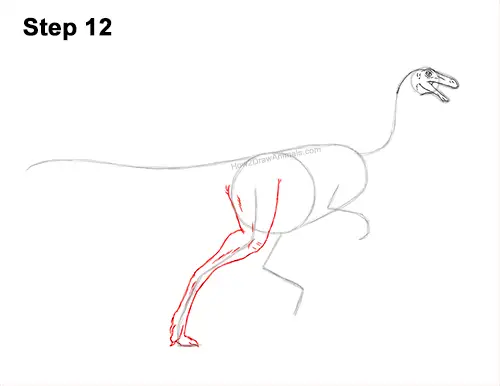
Step 12: Use the long, angled line under the dinosaur's body as a guide to draw the first leg. Follow the path of the guide and lightly sketch the shape of the Gallimimus' leg around it. The top part of the leg that's inside the body should be wide, and the shape should gradually be thinner toward the bottom. Bend the shape of the leg where the guide bends to indicate the joints.
When you get the shape of the leg right, darken the lines. Curve the lines in the middle to indicate the muscles. Draw a small, U-shaped line at the bottom for the first toe. Make the bottom of the line pointy for the Gallimimus' claw. On the left, draw another curved line with a pointy tip for another toe. Add a few short lines inside the shape for the creases and texture on the skin.
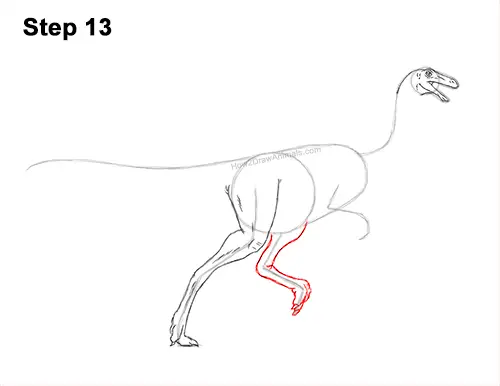
Step 13: Use the line on the right as a guide to draw the Gallimimus' other leg the same way. Draw the shape of the leg around the guide. Sketch lightly at first. Make the top part wide and the bottom part narrow. Darken the lines when you get the shape right. Bend the shape in the middle and add a few creases in the joint using short lines. At the bottom, draw a couple of short, U-shaped lines with pointy tips for the dinosaur's toes pointing down as the leg steps forward.
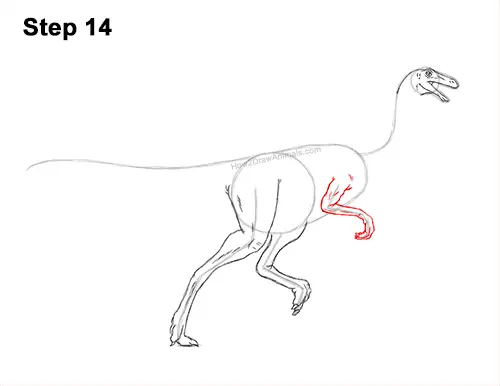
Step 14: Lightly sketch the shape of the Gallimimus dinosaur's first arm around the angled line on the right. Make the top part a bit wide but mainly keep the edges of the arm close to the guide so that the shape is skinny. At the bottom, draw a couple of thin, long shapes that curve to the left for the digits. Make the tips pointy. Bend the shape at the joints. Darken the rest of the lines when you get the shape right.


