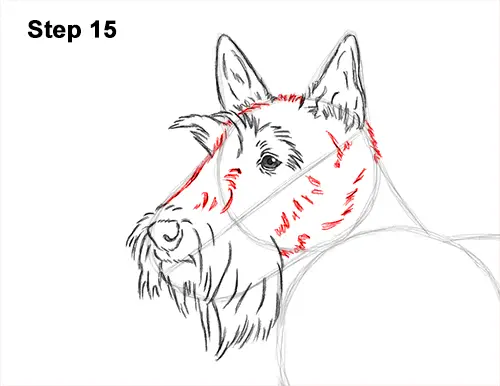
Step 15: Darken the outer edges of the initial guides to create the shape of the Scottish terrier's head. Use short strokes along the path of the guides to create a furry texture. Don't overlap the ear on the right. Add a few strokes inside the shape of the head for more detail on the fur.
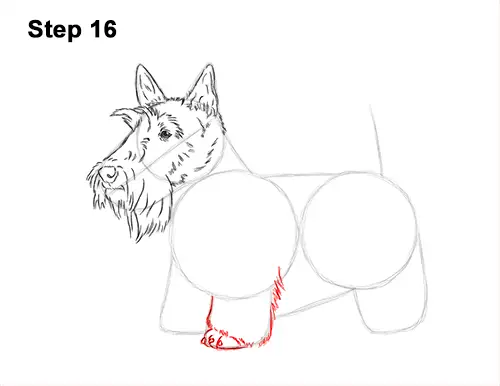
Step 16: Use the curved line under the first circle as a guide to draw the front leg. Use a series of short strokes along the edge of the guide to create the furry texture on the leg. On the tip of the foot, draw a couple of short, curved lines for the toes. Add the nails on the tips of the Scottish terrier's toes.
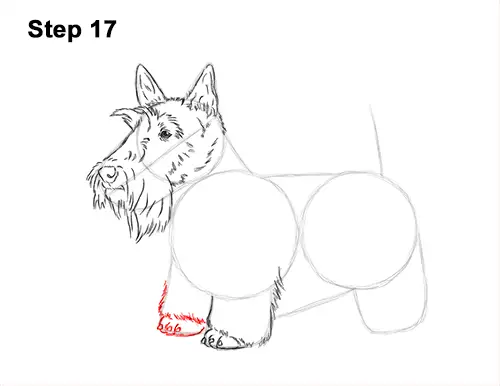
Step 17: Use the curved line on the left as a guide to draw the Scottie's other front leg the same way. Use curved lines at the bottom for the toes. The nails are made up of tiny, triangular shapes. Add a series of strokes at the top for the dog's fur.
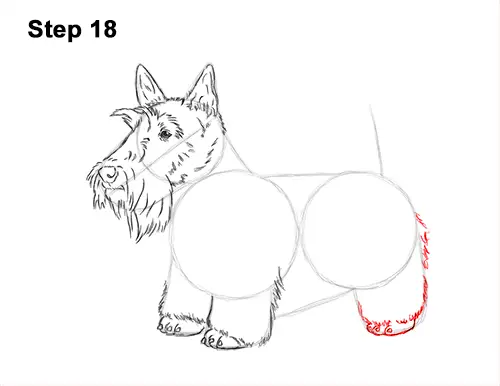
Step 18: Draw a series of short strokes close to the bottom of the guide on the right side. Draw more short strokes along the path of the guide to create the shape of the Scottish terrier's furry leg. Draw the toes at the bottom using curved lines and the nails as little triangular shapes.
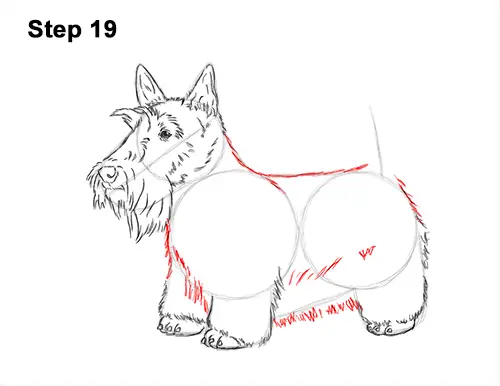
Step 19: Use the remaining lines as guides to draw the rest of the Scottish terrier's body. Draw a series of short strokes along the outer edges of the guide to create the furry shape of the body. The longer the strokes are, the shaggier the Scottie's fur will appear. Add some strokes inside the body too. The strokes along the top edge of the body should be shorter and flatter.


