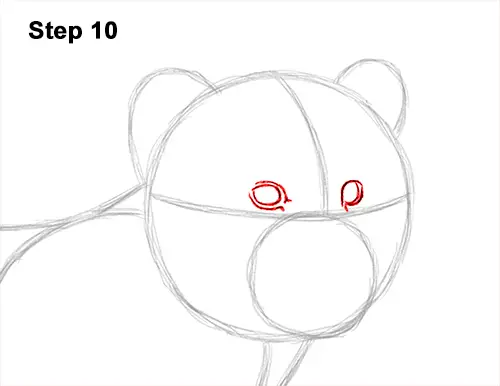
Step 10: Lightly sketch the tiger cub's eyes inside the head as two small circles. Use the initial lines as guides. When you get the size and position of the tiger cub's eyes right, darken the lines. As you darken the circles, make the sides a bit pointier for a more eye-like shape. Draw a curved line above and below the eye for extra detail. Darken the eye on the right the same way but make it a bit smaller. Make the sides of the shape pointy and draw a curved line on the bottom.
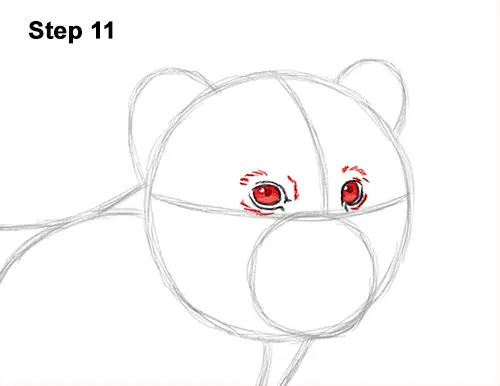
Step 11: Inside each eye, off to the side, draw a tiny circle to represent glare or highlight. In the middle of each eye, draw a dot for the pupils. Shade the eyes but don't overlap the tiny glare circles. As you shade the eyes, use a value that's lighter than the tiger cub's pupils. Draw a series of short strokes above the eyes for the furry brow. Draw a line under the eyes too. The area inside these broken lines will be white fur later on.
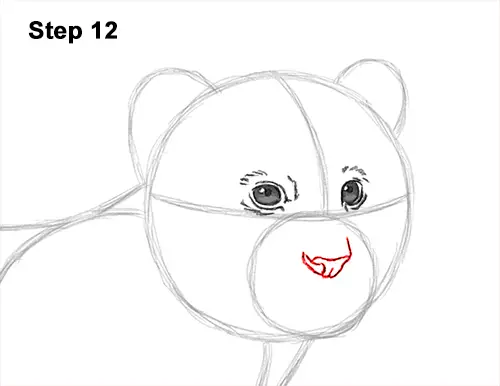
Step 12: Inside the muzzle, near the right side, lightly sketch a small triangle for the tiger cub's nose. When you get the position and size right, darken the lines. Use a wavy line for the top edge. When you darken the left edge, curve the line inward to create the nostril. Make the bottom tip curvier. Draw a short line at the bottom. Draw a spike- like shape on the top, left for to extend the nostril.
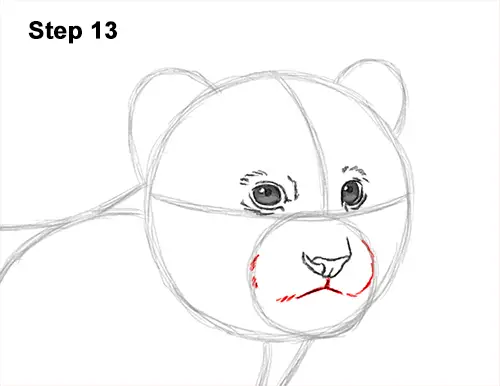
Step 13: Under the nose, draw a curved line for the mouth. Draw a curved line to the right of the nose for the side of the muzzle. Use the small circle as a guide. Darken a small portion of the left edge of the initial circle to finish the shape of the tiger cub's muzzle.
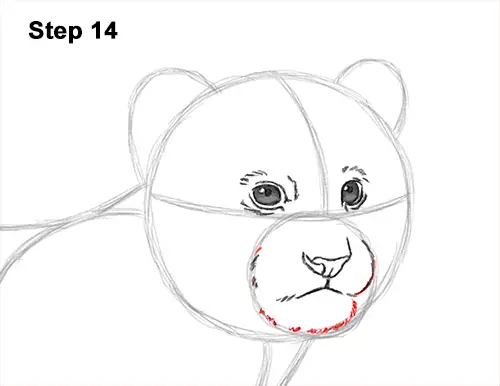
Step 14: Use the lower edge of the small initial circle as a guide to draw the tiger cub's chin. Draw a series of short strokes along the basic path of the circle to create the fuzzy texture of the chin.


