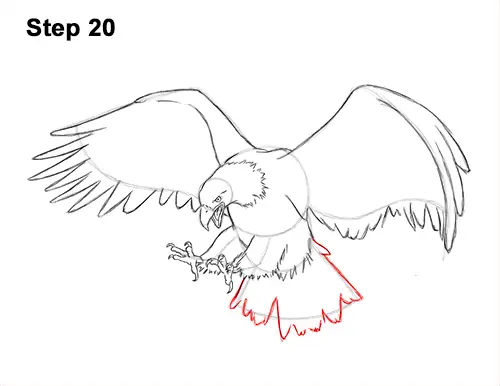
Step 20: Use the shape at the bottom as a guide to draw the bird's tail. Follow the path of the bottom line and draw a series of small arcs for feathers. Give the bald eagle's feathers varying thicknesses and add some different- sized gaps between the feathers.
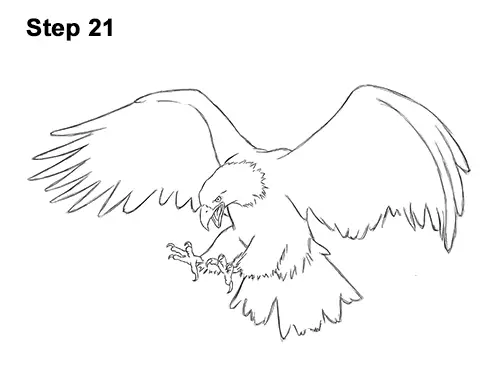
Step 21: For a cleaner look, erase as much as you can of the initial guide lines. Don't worry about erasing all of the guides. It's okay to leave some behind. Re-draw any final sketch lines you may have accidentally erased.
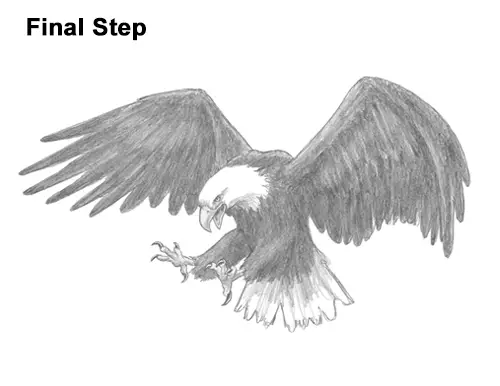
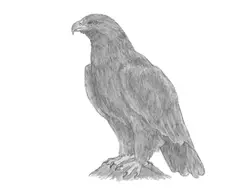
Final Step: Add some shading to your bald eagle drawing for extra detail. Use a dark value everywhere except the bird's head, tail and feet. As you shade, use strokes that go in the general direction of the feathers. Use a slightly lighter value at the middle for a second row of feathers and along the top edge of the bird's wing. Vary the pressure on your pencil to get different degrees of tonal value.
Don't worry about shading too smoothly. The rough value will give the feathers some texture. Use a lighter value to create a stripe- like pattern on the top part of the bald eagle's wing on the right for more feathers. The edges of the wing should also be lighter. The feathers along the bottom should be very dark. It's a good idea to use reference as you draw for a more accurate bald eagle.
Shading can be time-consuming, so be patient and take breaks. Add some shadows to the white sections to give the figure more dimension and volume. Don't forget to pause the video after each step to draw at your own pace.
Thanks for visiting! Subscribe to the How2DrawAnimals YouTube Channel for a new tutorial every week.
To learn how to draw popular cartoon characters, visit EasyDrawingTutorials.com.
RELATED TUTORIALS
 |
 |
 |


