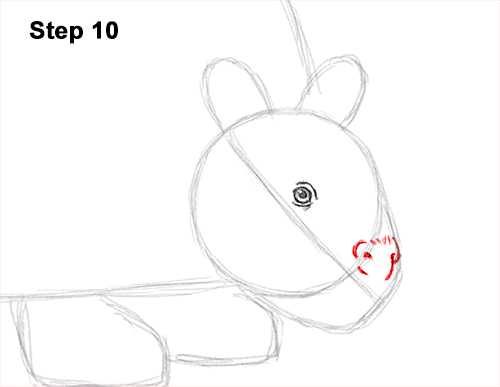
Step 10: Darken the right edge of the initial arc to create the front of the muzzle. Inside the muzzle , draw a couple of slit-like shapes and shade them in for the doedicurus' nostrils. Add a few short strokes above the nostrils for fur. Draw a few more lines around the nostrils to give the nose structure.
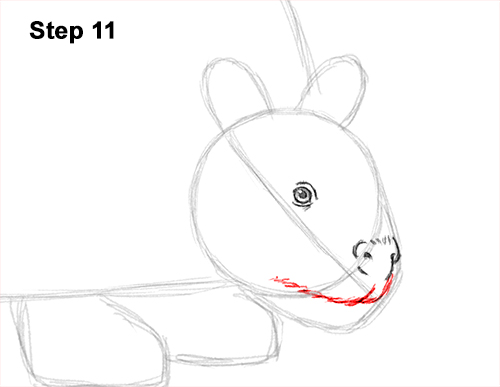
Step 11: Draw a line below the nose that curves to the left for the mouth. This line should be made up of short strokes to represent the fur along the mouth. The glyptodon's mouth should be parallel to the bottom edge of the initial guide lines.
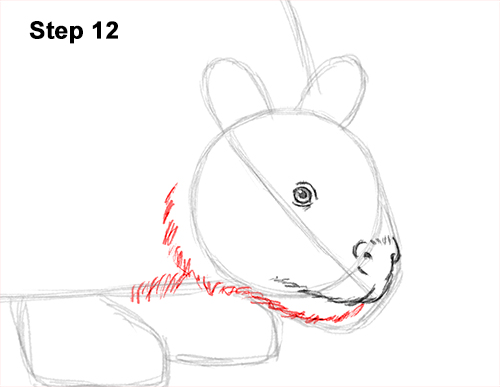
Step 12: Draw a series of short strokes along the path of the guides at the bottom to create the furry chin/jaw. On the left side, draw short strokes that follow the curvature of the initial circle for the side of the head. Add some short strokes along the horizontal guide line at the bottom for a bit of the neck.
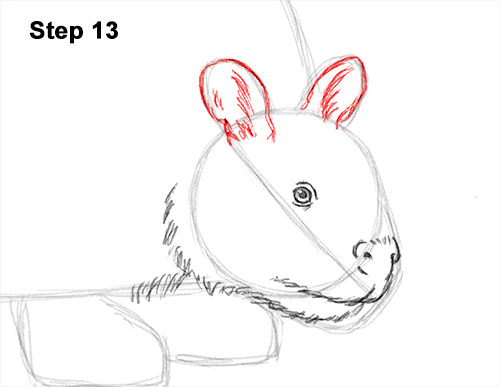
Step 13: Darken the arc on the top, left side of the head to create the glyptodon's first ear. Make the bottom part longer and narrower. Add some short strokes inside for fur. Use the arc on the right as a guide to draw the other ear the same way.
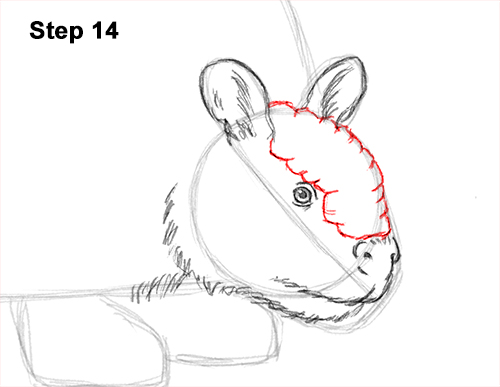
Step 14: Darken the right edge of the initial guides to create the bony plate on the doedicurus' head. As you darken the edge of the guides, make the lines jagged and angled to give the bony plate more texture. Draw a sloping, jagged line that starts at the ear, goes over the eye and ends on the nose for the inside edge of the bony cap. Add a few extra lines around the edge of the shape and inside to give the bony cap more texture.


