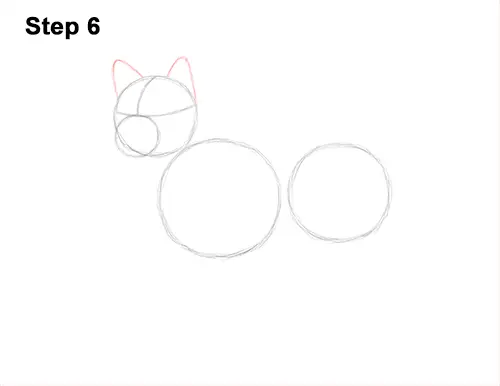
Step 6: On top of the head, draw two small, triangle-like shapes as guides for the ears. Pay attention to the size of the ears in relation to the shiba inu's head.
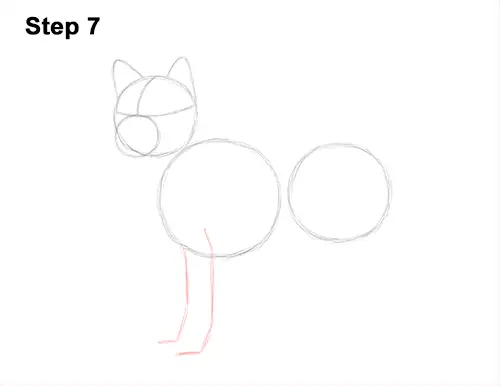
Step 7: Under the circle on the left, draw two long lines as guides for the shiba inu's front legs. Curve the lines a bit and bend them at the bottom to indicate where the feet will be.
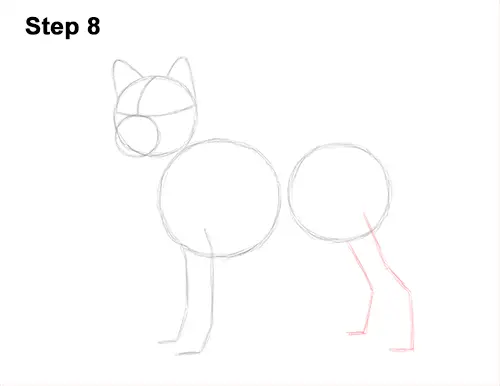
Step 8: Under the circle on the right, draw two more lines as guides for the hind legs. Bend the lines near the middle to indicate where the joints will be.
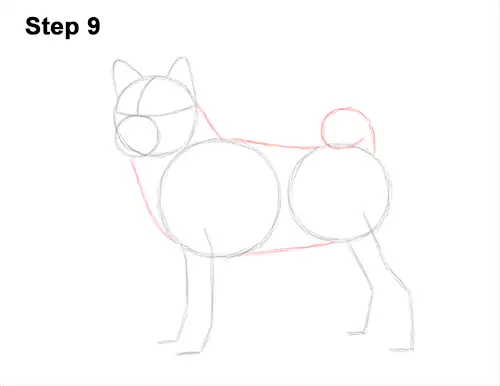
Step 9: Draw two lines that connect the head to the body to form the guide for the dog's neck. Connect the first two circles using a couple of lines to finish the guide for the shiba inu's body. On the top, right side of the body, draw a curved line as a guide for the tail.
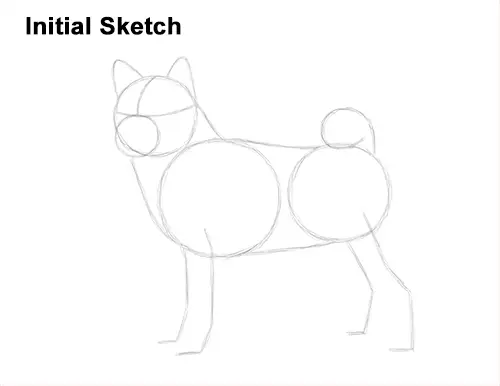
That's it for the guides! From this point on, press harder with your pencil for a more defined drawing.


