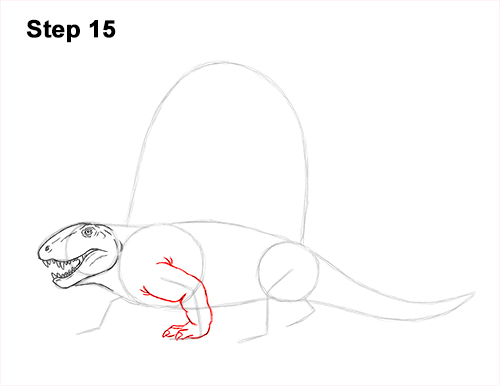
Step 15: Use the second line from the left as a guide to draw the first front leg. Follow the guide and lightly sketch the shape of the short leg around it. When you get the shape of the leg right, darken the lines. The leg should be short and thick. Curve the lines where the guide bends for the joints. At the bottom, draw the dimetrodon's toes using thin shapes. At the tips, draw triangular shapes for the claws.
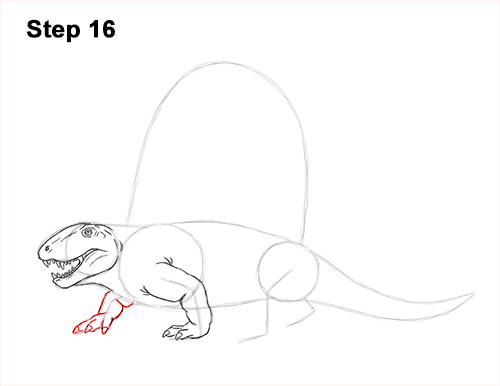
Step 16: Use the line on the far left as a guide to draw the dimetrodon's other front leg the same way. Follow the basic path of the guide and draw the shape of the leg around it. At the bottom, draw a few toes using thin shapes. At the tips of the toes, draw triangular shapes for the claws.
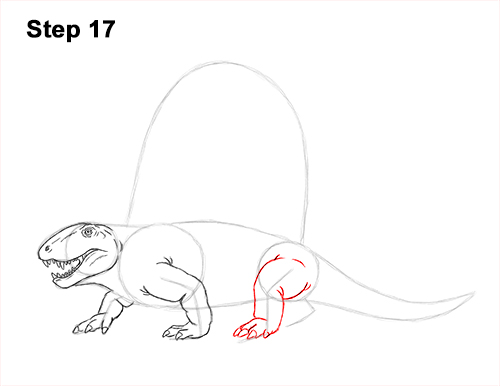
Step 17: Use the angled line to the right as a guide to draw the first hind leg. Lightly sketch the leg around the guide. Only darken the lines when you get the shape right. Follow the angles of the guide to create the joints on the leg stepping forward. The top of this leg should stretch far inside the body. Make sure that the bottom of this foot lines up with the bottom of the dimetrodon's first front foot.
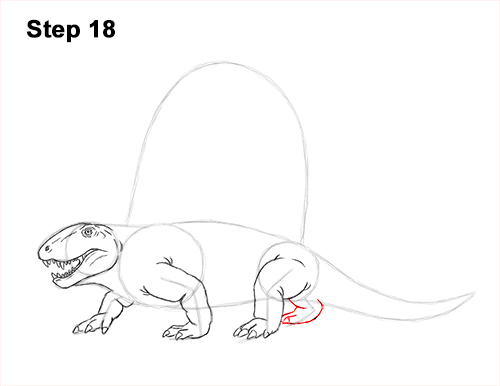
Step 18: Use the short, angled line on the far right side as a guide to draw the final leg the same way. The top part of this leg is hiding behind the dimetrodon's body, so don't worry about drawing it.
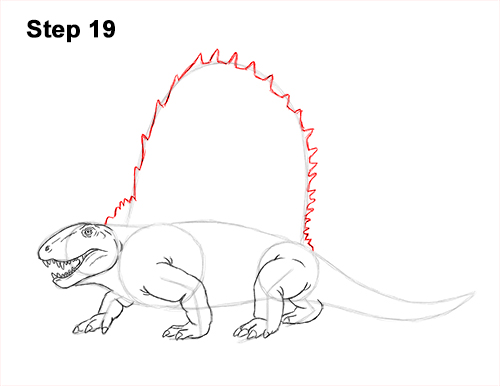
Step 19: Use the big arc on top of the body as a guide to draw the dimetrodon's spiny sail. Draw a series of pointy, angled lines along the path of the arc for the spikes on the sail. Don't draw the spikes too long. Draw them fairly close to the initial arc shape. Place the spikes close to each other. The gaps between them shouldn't be too big. On either end, extend the spikes farther out to the sides to make the sail wider.


