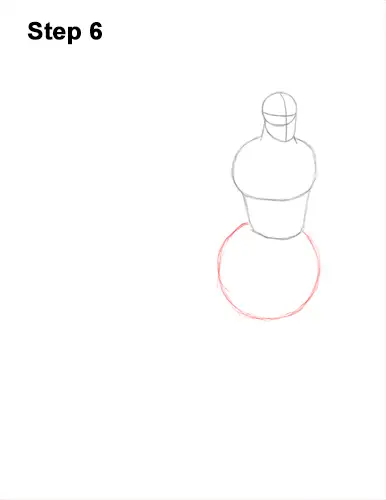
Step 6: Below the centaur's torso, draw a big circle as a guide for the front part of the horse body. First make a few marks to indicate the circle's height and width. Then connect the marks using curved lines. Pay attention to how big this circle is in relation to the human torso above.
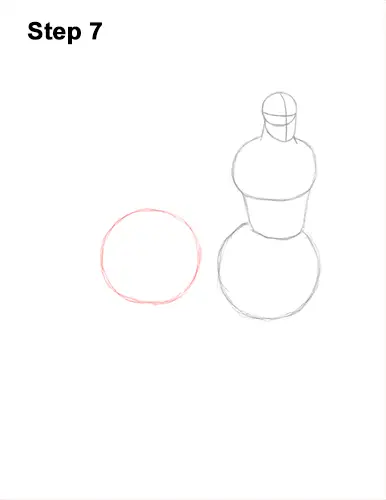
Step 7: To the left, draw another circle the same way as a guide for the back portion of the horse body. This circle should be slightly smaller. Don't draw the circles too far apart or the centaur's body will be too long.
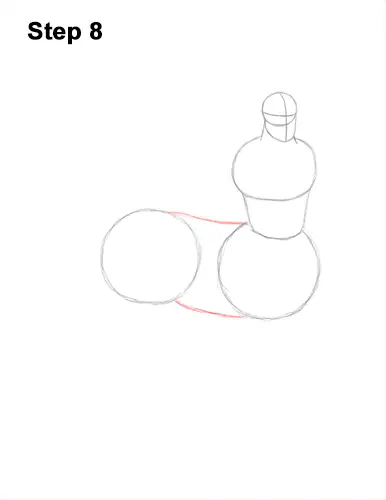
Step 8: Connect the two circles using a couple of curved lines to finish the guide for the horse's body.
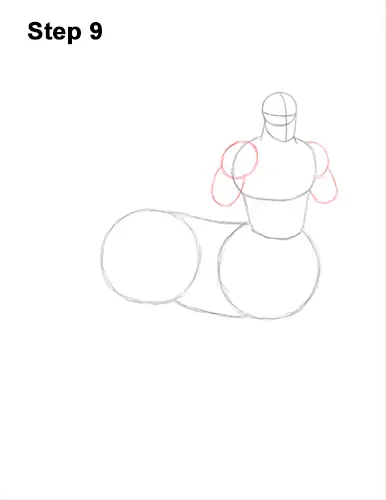
Step 9: On the top, left side of the torso, draw a small circle as a guide for the first shoulder. On the top, right side, draw a half-circle for the visible part of the other shoulder. Below each shoulder, draw a U-shaped line as a guide for the bicep section of the arm. The bicep on the right side should be partially blocked by the centaur's torso.
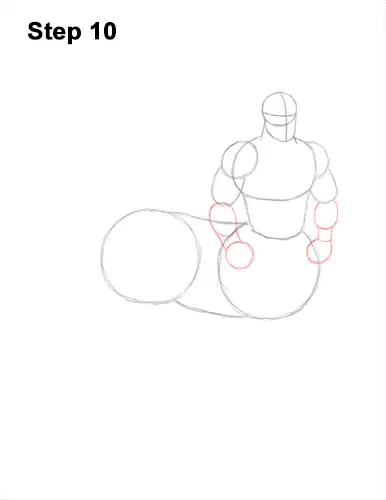
Step 10: Below each of the centaur's biceps, draw a small oval as a guide of the top part of the forearms. Tilt the ovals inward a bit to indicate the elbow joint above them. Below each forearm, draw a couple of lines for the wrists and a small circle for the fists. It's okay if the arms overlap the shape of the horse body because they're going to be in front of it.


