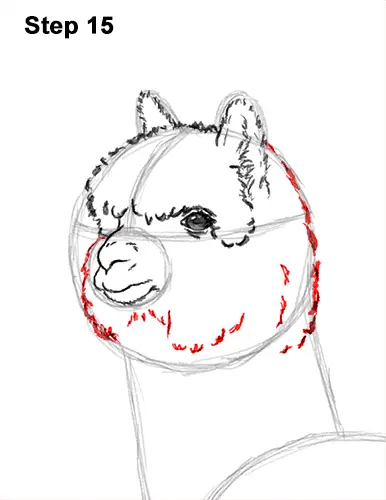
Step 15: Use the rest of the initial circle as a guide to finish the shape of the alpaca's head. Draw short strokes along the path of the circle to create the fluffy head but make the left side thinner. At the bottom, curve the strokes up so that they're closer to the muzzle. The strokes then should curve up toward the ear to create a fluffy cheek.
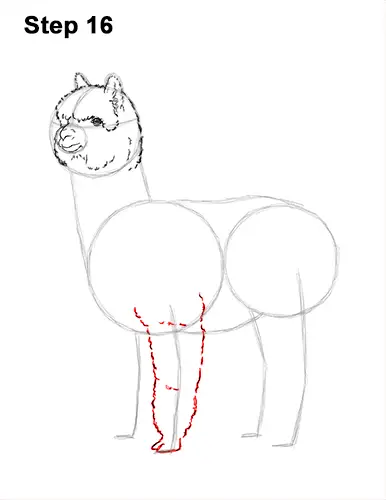
Step 16: Use the second vertical line from the left as a guide to draw the alpaca's first front leg. Follow the guide and lightly sketch the shape of the leg around it. This alpaca's wool will be fluffy, so make the shape of the leg thick around the guide line. When you get the shape of the leg right, darken the lines. The bottom should be thinner for the foot.
Use a series of short, curved lines to indicate the fluffy texture of the alpaca's wool. The leg should be thick at the top and then gradually get a bit thinner toward the bottom. At the bottom, draw a curved line for the foot. Add a short line near the tip to split the hoof.
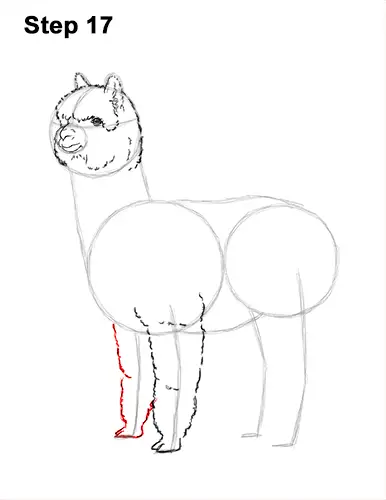
Step 17: Use the line on the left as a guide to draw the other front leg the same way. Lightly sketch the leg around the guide. When you get the shape right, darken the lines. Make the shape of the alpaca's foot thinner at the bottom and don't forget to split the hoof at the tip.
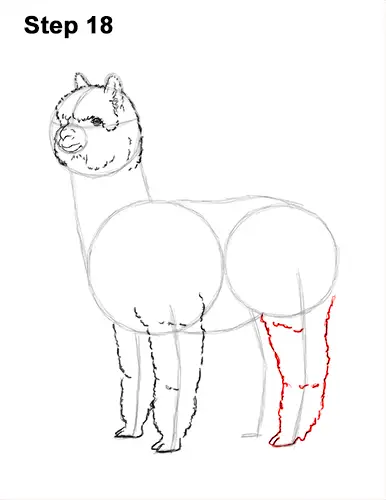
Step 18: Use the line on the far right side as a guide to draw the first hind leg. Lightly sketch the alpaca's leg around the guide and only darken the lines when you get the shape right. The top part of the hind leg should be wider than the top part of the front leg. Remember to use small, curved lines for a fluffy texture. Add some lines inside the leg for extra detail.
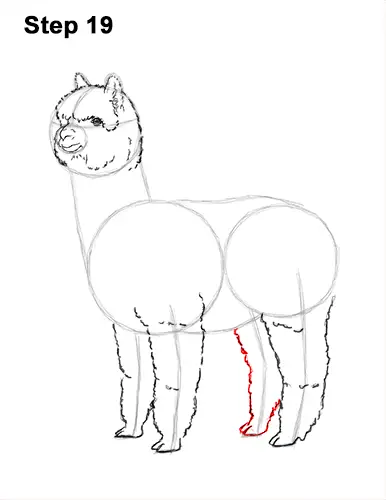
Step 19: Use the last line under the body as a guide to draw the alpaca's other hind leg the same way. A big part of this leg will be hidden behind the first hind leg, so don't draw that section.


