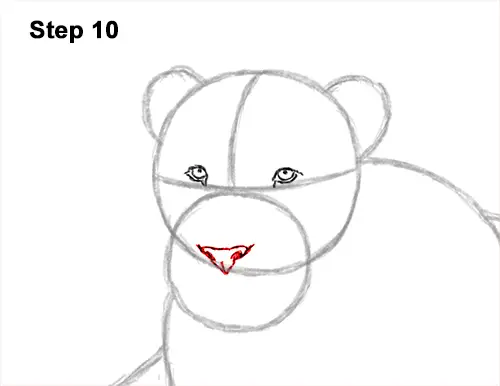
Step 10: Lightly sketch a small triangle along the bottom edge of the first circle for the lion's nose. When you get the size and position right, darken the lines. Make the top sides longer. On each side, darken a small oval for the lion's nostrils. Add a short line at the bottom and darken the top edge.
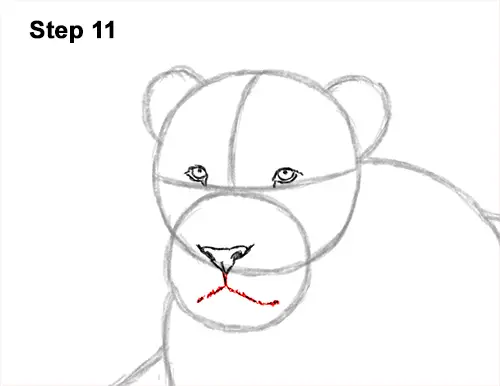
Step 11: Under the nose, draw a line that's splits into two for the lion's mouth. The lines should curve to the sides of the small circle, but they shouldn't be too long.
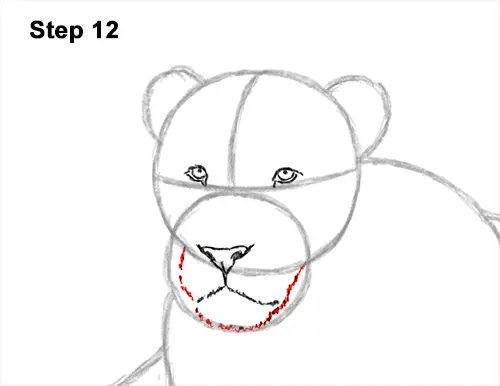
Step 12: Continue to draw the line on the left side to create the muzzle. Curve the line upward so that it almost touches the top of the lion's nose. Use the bottom edge of the initial circle as a guide to create the chin. Draw the chin/side of the muzzle along the path of the guide and use short strokes for fur.
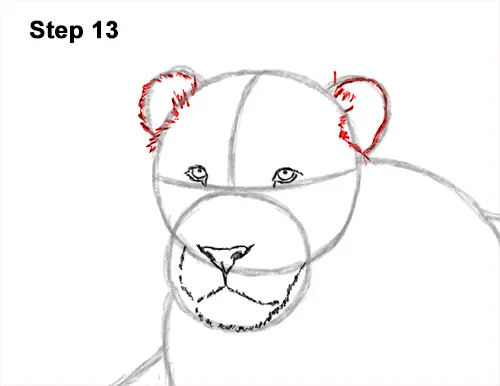
Step 13: Draw a series of strokes along the bottom edge of each ear. These strokes represent the part of the mane that is in front of each ear. Darken the initial arcs using a series of short strokes to create the shapes of the lion's ears.
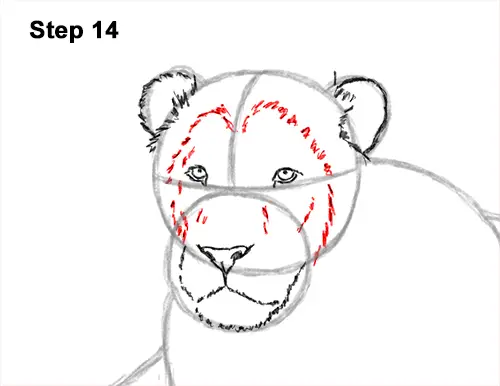
Step 14: Use a series of short strokes inside the head to create the inner edge of the lion's mane. Draw an arc that's made up of short strokes on the upper, left side. Use the construction lines as guides. Add some short lines on the side of the eyes and muzzle to give the lion's face more structure. Add another arc that's made up of short strokes on the top, right side for more of the mane. Continue to draw the strokes toward the bottom and add some lines inside the face for more structure.


