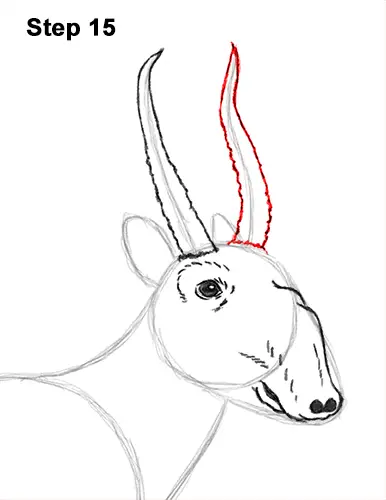
Step 15: Use the wavy line on the right as a guide to draw the other horn the same way. The bottom of the horn should be wide , and the top should end in a pointy tip. It's okay if the bottom of the saiga's horn overlaps the guide for the ear a little bit.
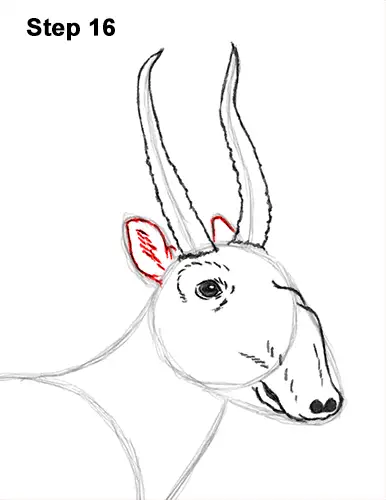
Step 16: Darken the small arcs on the head but make them pointier to create the shape of the saiga's ears. Draw a few short strokes inside the ear on the left for the fur found there.
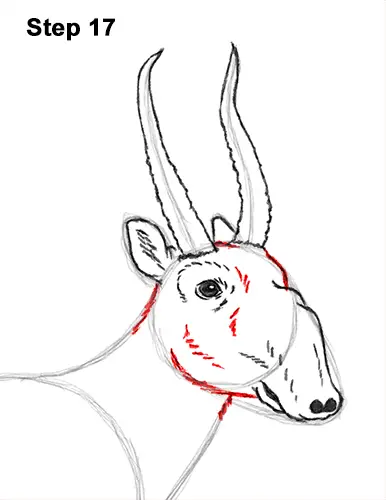
Step 17: Use the main circle as a guide to draw the rest of the saiga antelope's head. Darken the bottom edge of the circle to create the jaw. Darken part of the lines under the head to create the top of the neck. Add a series of short strokes inside the head for extra detail on the fur.
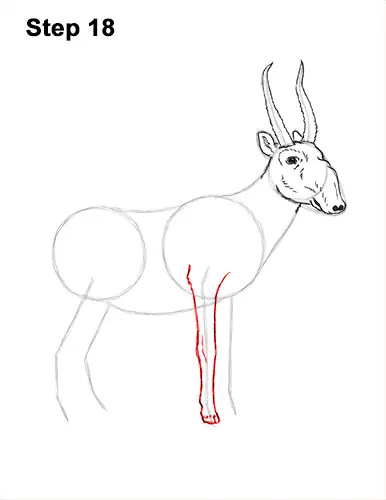
Step 18: Use the second line from the right as a guide to draw the first front leg. Follow the guide and lightly sketch the shape of the leg around it. Make the shape bulge out a bit near the middle to indicate the joint. When you get the shape of the saiga's leg right, darken the lines. Draw a few short strokes near the middle to emphasize the joint. Bend the foot slightly to the right at the bottom. Use a short line to split the hoof.
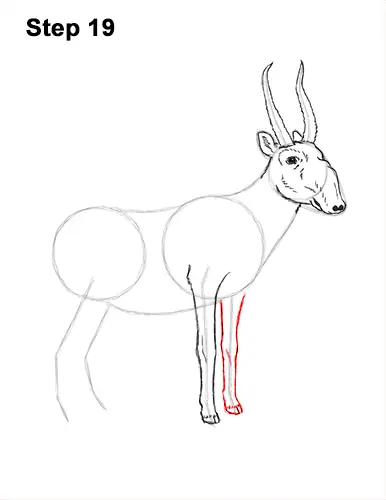
Step 19: Use the line on the far right side as a guide to draw the saiga's second front leg the same way. First lightly sketch the shape of the leg around the guide. Then, when you get the shape right, darken the lines. Make the middle section bulge out a bit for the joint and bend the foot forward slightly.


