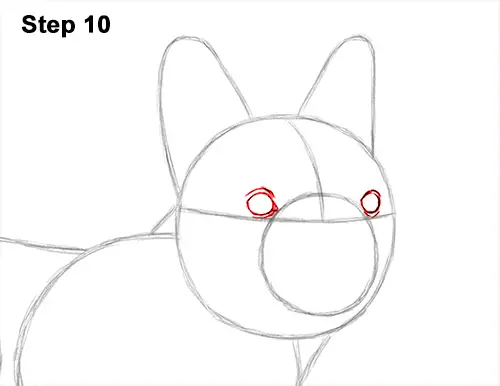
Step 10: Lightly sketch the eyes inside the head as two small circles. Use the initial construction lines as guides for size and position of the eyes. When you get the size and position right, darken the shapes of the French bulldog's eyes. As you darken the shapes, make the sides a bit pointier for the corners of the eyes. Add some lines around the eyes for the eyelids and wrinkles.
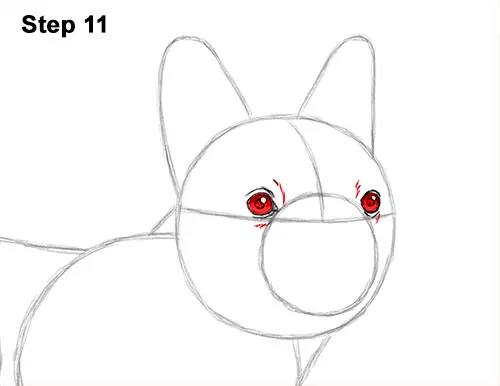
Step 11: Inside each eye, off to the side, draw a small circle to represent glare. In the middle of each eye, add a big dot for the Frenchie's pupils. Don't overlap the glare circles. Shade in the rest of the eye for the irises and be careful not to overlap the glare circles. As you shade the irises, use a value that's slightly lighter than the pupils. You can also use a slightly lighter value near the bottom to create a round effect. Draw a series of lines around the dog's eyes for fur. Break up these lines into shorter strokes for a fur-like texture.
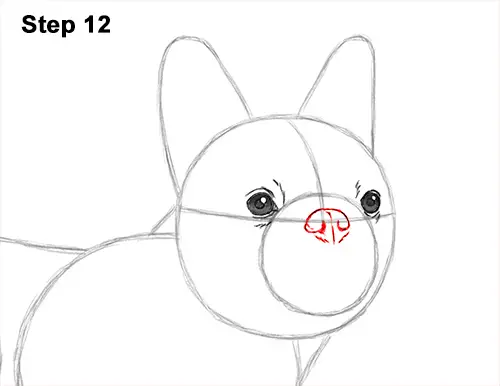
Step 12: Lightly sketch a small oval where the construction lines meet for the nose. When you get the size and position of the nose right, darken the top part. Darken the sides of the oval but curve the lines inward to create the Frenchie's nostrils. Draw a couple of short, vertical lines that split the nose in half. Darken the bottom part using short strokes but make the shape pointier.
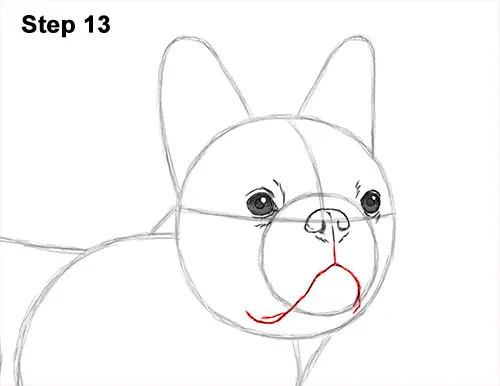
Step 13: Draw a short line under the nose for the top part of the French bulldog's mouth. The line then splits with one side going left and the other going right to create the jowls. The left side should slope down almost to the edge of the very first circle and then curve up. The right side should stretch all the way to the edge of the muzzle guide.
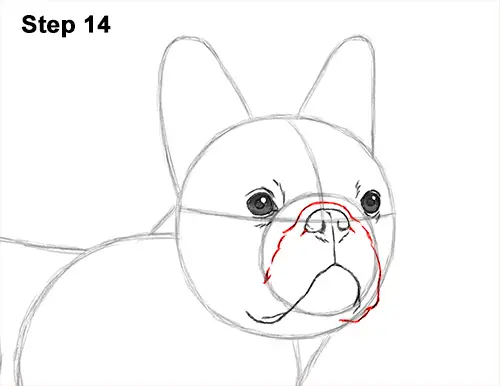
Step 14: Draw a curved line over the nose for the folded skin. Follow the path of the initial circle and darken the right edge for the muzzle. When you get to the bottom, use the big circle as a guide to complete the right side of the muzzle. Add a few short lines on the left side to complete the shape of the French bulldog's muzzle.


