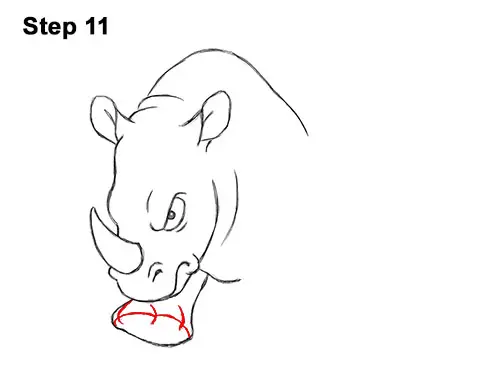
Step 11: Draw a curved line for the foot's sole and three shorter lines at the top for the rhino's toes.
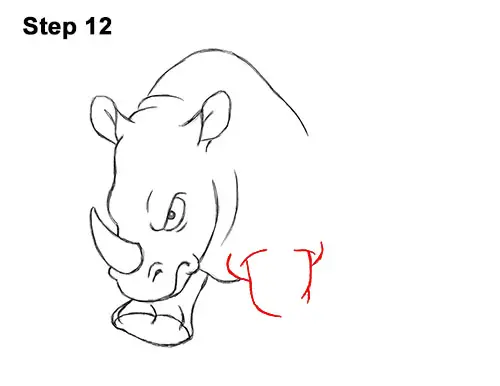
Step 12: At the bottom, draw the top part of the other front leg using a series of curved lines. The lines on the sides are similar to a really long letter T. Add a couple of curved lines at the top for creases. Don't make these lines too long.
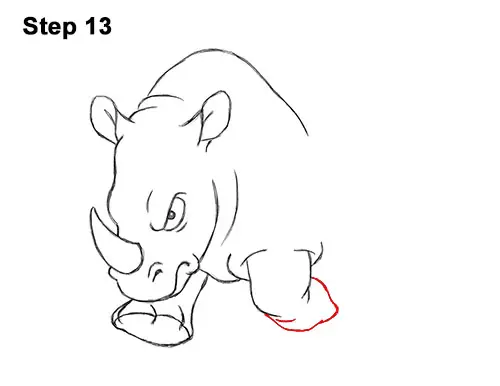
Step 13: Draw a long, curved line at the bottom for the lower half of the rhino's leg. This leg should be bent with the sole facing backward. Don't dip the curve too low.
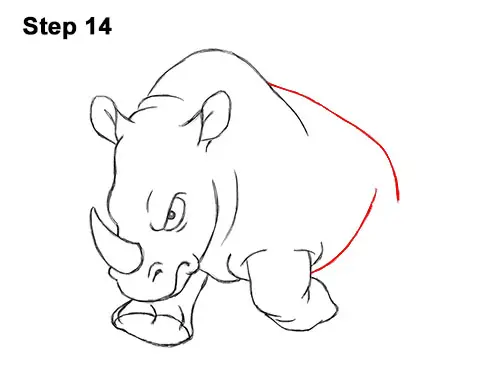
Step 14: To the right of the front leg, draw a long, sloping line for the underside of the rhino's body. At the top, draw another long, curved line for the rump.
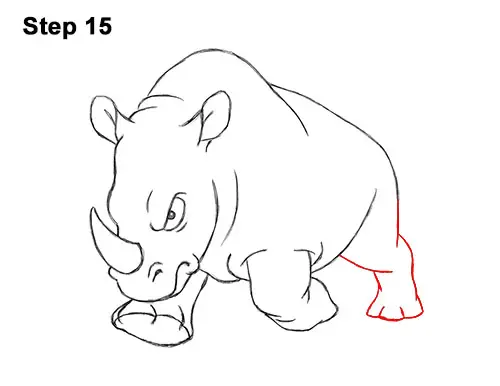
Step 15: On the lower, right side of the body, draw the hind leg using a series of curved lines. The leg should be thin in the middle and wide at the top and at the bottom. The top of the leg should overlap the bottom. Draw two short lines on the foot for the rhino's toes.


