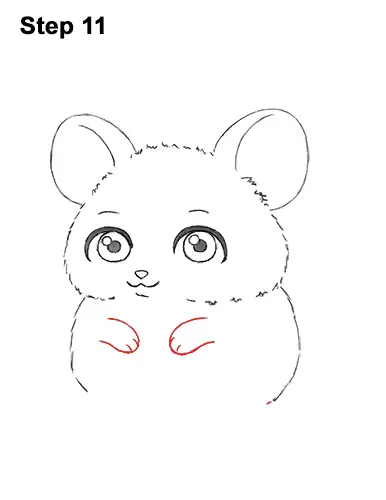
Step 11: Inside the body, draw a couple of small arcs with a diagonal orientation for the mouse's front legs. Add a couple of lines at the tip of each leg for the digits.
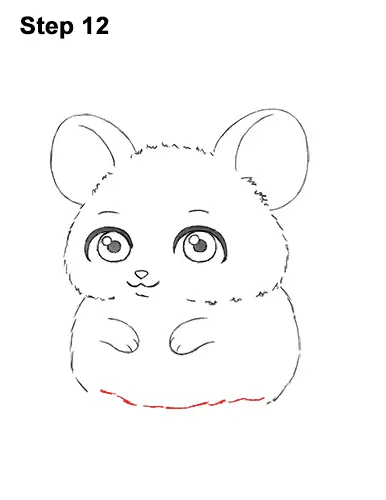
Step 12: Below the front legs, draw a wavy, horizontal line that's made up of quick, short strokes for the bottom of the mouse's body.
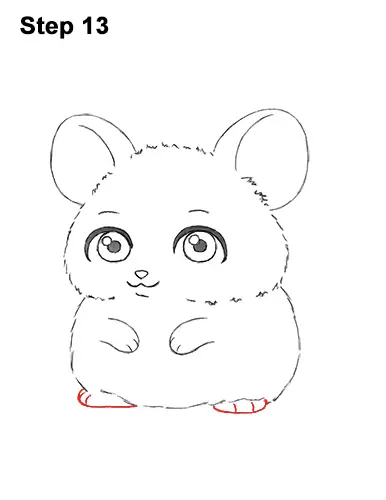
Step 13: Under the mouse's body, draw a couple of curved lines for the hind feet. Inside the feet, draw a couple of tiny curved lines for the toes.
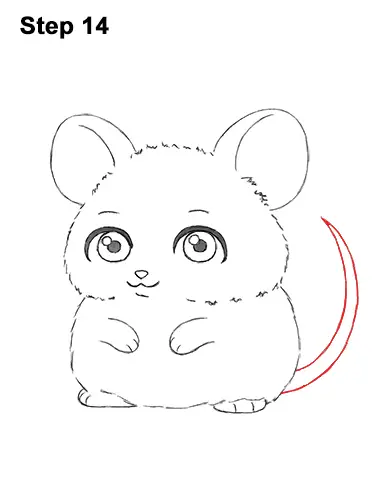
Step 14: On the right side, draw a couple of long, curved vertical lines that come to a point for the mouse's tail. For a simpler drawing, just draw a single curved line for the tail, so that it's not thick.
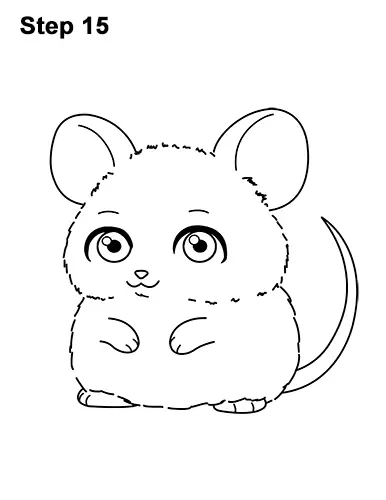
Step 15: Using a pen or marker, carefully go over the lines to make your cartoon mouse drawing permanent. After inking, get rid of every pencil mark with an eraser.
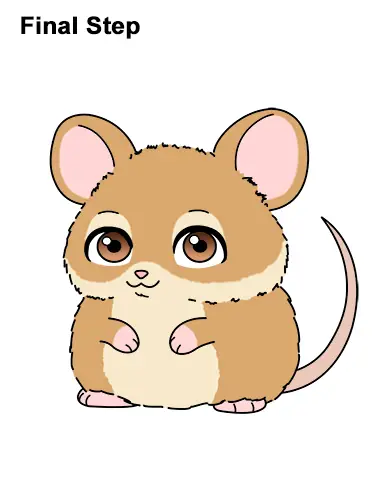
Final Step: Color your drawing using color pencils, markers or even crayons! Use brown to outline the fur separation. Color everything brown except for the ears, lower side of the head, middle of the body, eyes, feet and tail. Use pink for the inside to the mouse's ears, the nose, the feet and tail. Use light brown for the rest of the body except for the eyes. To get a gradient effect on the eyes, color the top part dark brown and the bottom part light brown.
Thanks for visiting! Subscribe to the How2DrawAnimals YouTube Channel for a new tutorial every Tuesday.
To learn how to draw popular cartoon characters, visit EasyDrawingTutorials.com.
RELATED TUTORIALS
 |
 |
 |


