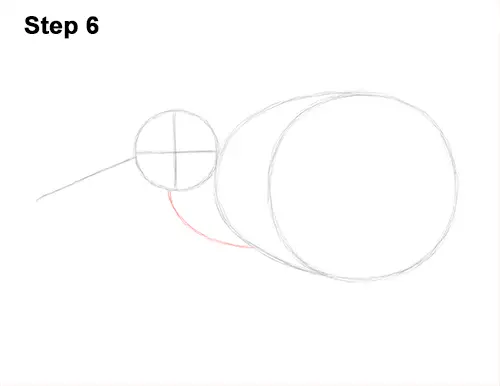
Step 6: Draw a curved line at the bottom that connects the head to the body to form the guide for the kiwi bird's neck.
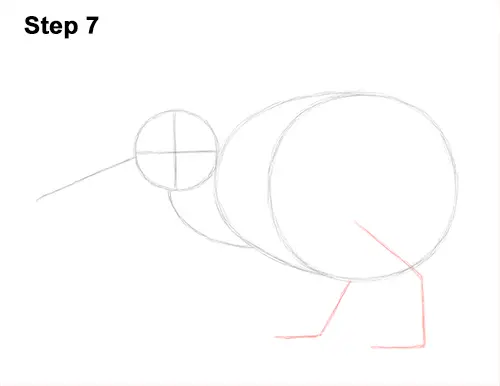
Step 7: Draw two lines under the kiwi's body as guides for the legs. The first line should start inside the circle and bend in the middle to indicate where the joint will be. Bend the line again at the bottom for the foot. The guide for the bird's other leg should consist of a diagonal line that bends at the bottom to indicate where the foot will be.
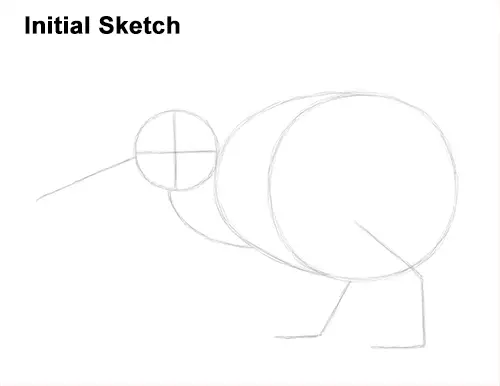
That's it for the initial sketch! From this point on, press harder with your pencil to get a more defined sketch.
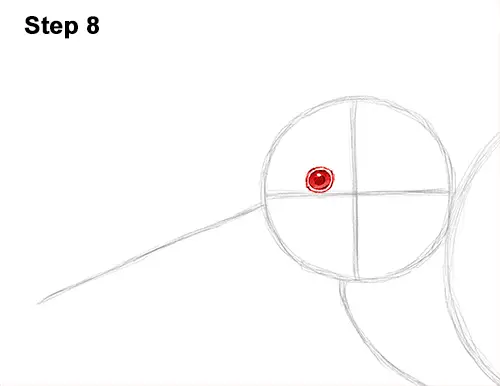
Step 8: Lightly sketch a small circle inside the kiwi's head for the eye. Use the construction lines as guides for placement. When you get the size and placement of the eye right, darken the circle. Draw a tiny circle inside the eye, off to the side, to represent glare and a bigger dot in the middle for the pupil. Shade the inside of the kiwi bird's eye except for the tiny circle that represents glare. As you shade the eye, use a value that's slightly lighter than the pupil. Draw a line surrounding the eye for the bare skin found there.
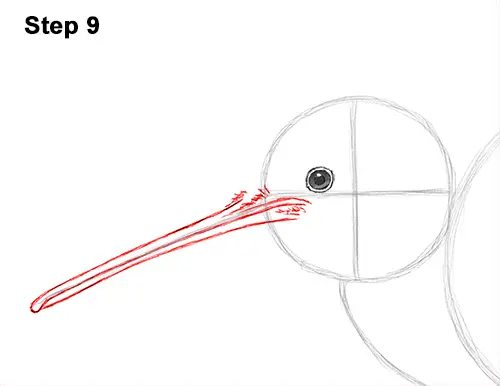
Step 9: Use the line on the left as a guide to draw the kiwi's beak. Darken the line and extend it inside the circle to create the mouth. It should end under the eye on the left side. Add a curved line above the mouth for the groove on the beak. Draw a series of quick, short strokes at the base of the beak on the right for the feathers. Add another long line above the mouth for the top part of the beak. The lines should be more or less parallel. Connect the two lines on the left side and make the tip of the beak wide and round. Add another long parallel line underneath for the bottom part of the kiwi's beak. Curve the line down slightly as it goes inside the head.


