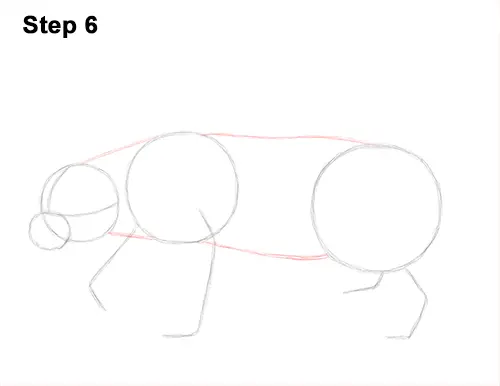
Step 6: Draw a series of curved lines that connect the major shapes to form the rest of the body. Draw two lines that connect the head to the first circle to create the honey badger's neck. Then add two more lines that connect the two main circles to form the rest of the torso.
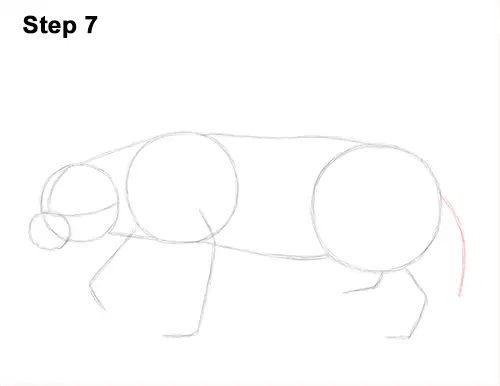
Step 7: Add a short, curved line on the right side as a guide for the tail.
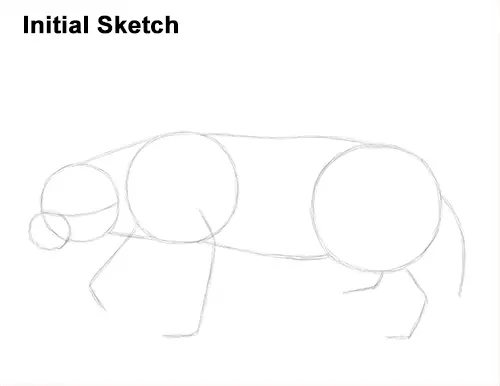
That's it for the initial sketch! From this point on, press harder with your pencil to get a more defined sketch.
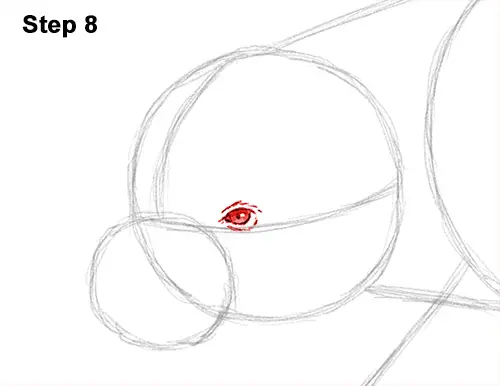
Step 8: Lightly sketch the eyeball inside the head as a small circle on top of the guide line. When you get the placement and size of the eyball right, add some darker lines around it for the actual eye shape. Make the left side of the shape pointy for the corner of the eye. Add a small dot in the middle for the pupil. Shade the eyeball except for a tiny circle to represent glare. Use a value that's slightly lighter than the pupil. Draw a few quick, short strokes around the honey badger's eye for the extra detail on the fur.
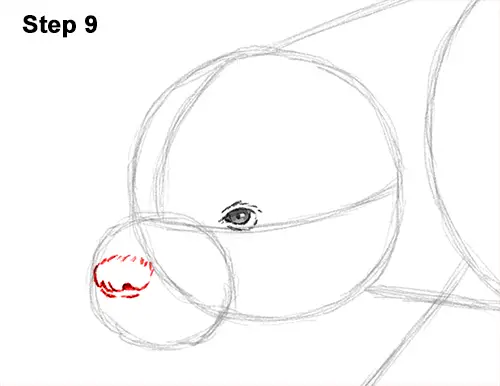
Step 9: Lightly sketch a small oval inside the muzzle on the left side for the honey badger's nose. When you get the shape and placement of the oval right, darken the lines. Use quick, short strokes at the top for the fur. The sides of the nose come in toward the middle to form the nostrils. Add a small line at the bottom too. Draw a couple of lines at the bottom of the nose to complete the overall shape.


