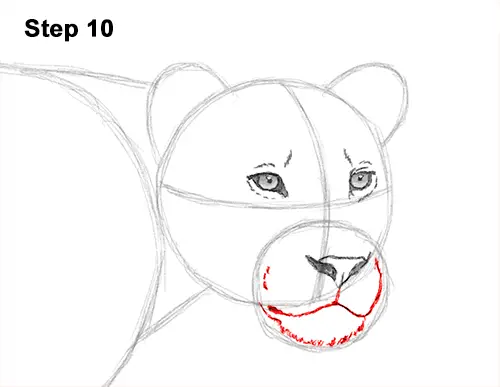
Step 10: Draw the lion's muzzle by first drawing a line under the nose. Follow the lower edge of the main circle as you curve the line to the left to create the mouth. Draw the top, right side of the muzzle by following the basic path of the small circle. Follow the lower edge of the small circle to create the chin. Use quick, short strokes to represent fur. Place the chin a bit higher than the lower edge of the small circle. The whole muzzle should fit within the circle.
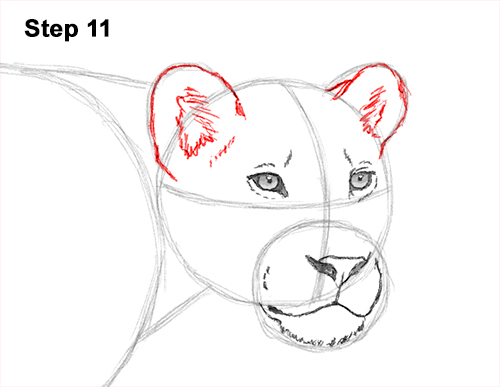
Step 11: Use the small arcs on the head as guides to draw the lion's ears. Follow the basic path of the arcs as you darken the lines to create the shape of the ears. Add a series of quick, short strokes for the fur inside the ears. Add the fur using quick, short strokes to the ear on the right as well.
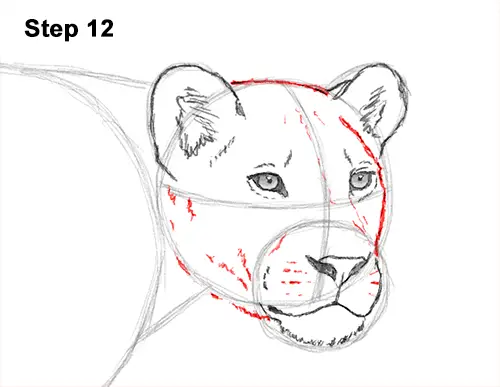
Step 12: Use the main circle as a guide to draw the rest of the lion's head. Follow the right edge of the circle to create the side of the face. Make the line for the face come inward more. Use quick, short strokes as you draw to give the head a furry texture. Follow the basic path of the initial circle on the lower, left side to draw the jaw. Add a few more lines inside the head to emphasize the texture of the fur. Add a series of short horizontal lines within the shape of the muzzle. Remember to use quick, short strokes to create a fur-like texture.
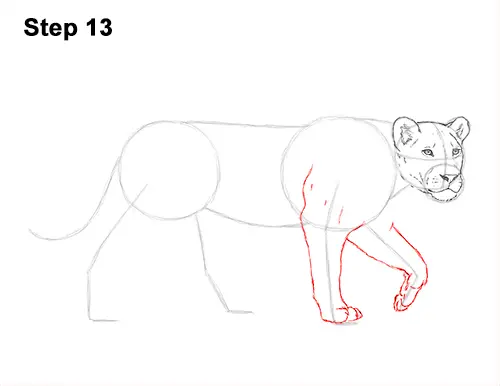
Step 13: Use the lines on the right side of the body as guides to draw the front legs. Lightly sketch the shape of the leg as you follow the path of the guide line. Make the shape thicker at the top and thinner at the bottom. Bend the leg to indicate the joints. When you get the basic structure of the leg right, darken the lines. Use a few curved lines at the tip of the foot to create the lion's individual toes. Add a few quick, short strokes within the shape of the leg for the fur.
Use the line to the right as a guide to draw the front leg on the other side the same way. First lightly sketch the basic shape of the leg around the guide line. The lioness is stepping forward, so this paw should point down. When you get the structure of the leg right, darken the lines. Draw the toes at the end of the foot using a few curved lines. Because the paw is pointing down, the toes should have shape similar to the letter U.
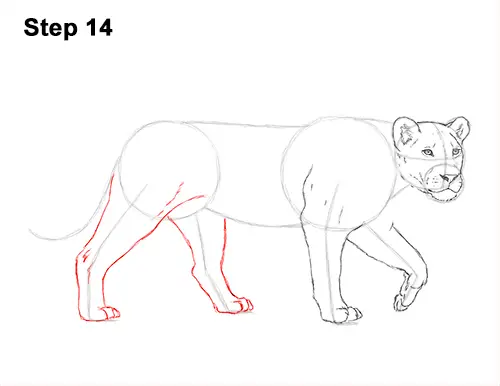
Step 14: Use the lines on the left as guides to draw the hind legs. Start by lightly sketching the shape of the leg as you follow the basic path of the guide line. When you get the basic shape of the leg right, darken the lines. Use curved lines at the tip of the foot for the toes. The lines should be similar to a backward letter C. Use curved lines to emphasize the shape of the muscles. The top part of the lion's leg whould be wider than the bottom.
Draw the other hind leg the same way. Sketch lightly at first, then darken the lines when you get the shape right. Notice that the joint in the middle comes outward more because the lioness is stepping forward. Don't forget to add the toes at the bottom! From this angle only three toes on each foot should be visible.


