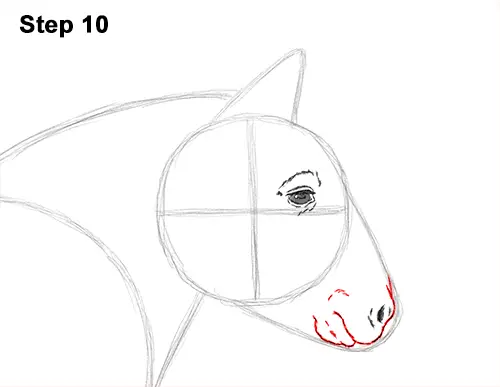
Step 10: Draw the rest of the pony's muzzle using the initial arc as a guide. Follow the basic path of the arc as you darken the line to create the front part of the muzzle. Curve the line inside the head, under the nose, to create the mouth. Draw a curved line under the mouth, while still using the initial arc as a guide, to create the chin. Add a few lines around the mouth for extra detail on the skin.
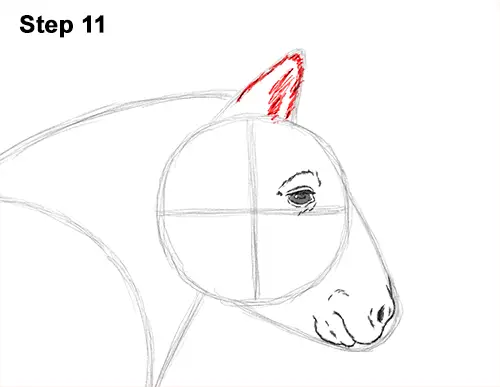
Step 11: Use quick, short strokes as you follow the path of the triangle-shaped line on the head to create the pony's ear. Add some strokes inside too. The other ear will be hidden behind the mane, so don't draw it.
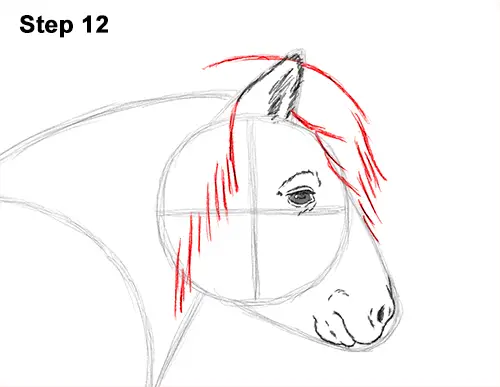
Step 12: Draw the front part of the pony's mane using a series of long, curved lines. Follow the path of the top of the guides as you draw curved lines under each other. Now draw a longer curved line above the head and behind the ear for the top part of the mane. Draw a few more lines below the long curved line for the outer edge of the mane. Draw the basic shape of the mane as a clump instead of drawing every individual hair strand. Add a few vertical lines on the left side for the bottom edge of the mane.
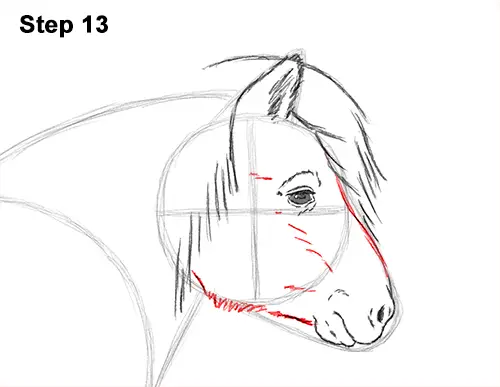
Step 13: Darken the top part of the initial guides to create the pony's head. Use quick, short strokes to represent the shaggy coat at the bottom of the head. Add a few quick, short strokes within the head for extra detail on the coat.
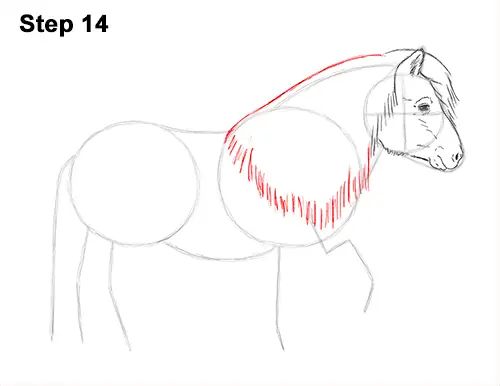
Step 14: Draw a curved line slightly above the guides to create the top part of the pony's mane. Continue drawing the short vertical lines down toward the top of the leg for the bottom part of the mane. Draw the short lines on the left side too, to connect to the top part of the mane.


