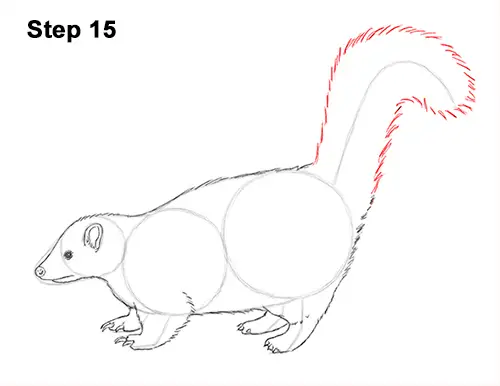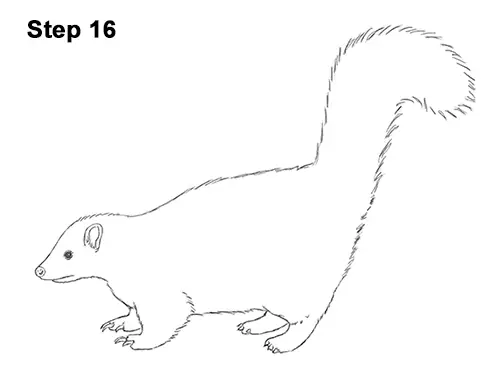
Step 15: Use the long curved line on the right as a guide to draw the skunk's big tail. Skunks have big furry tails, so make the shape wider as you follow the basic path of the guide. You can use even longer strokes to make the fur on the tail appear longer and shaggier.

Step 16 (optional): For a cleaner look, erase as much as you can of the initial guide lines. Don't worry about erasing all of the guides. It's okay to leave some behind. Re-draw any final sketch lines that you may have accidentally erased.

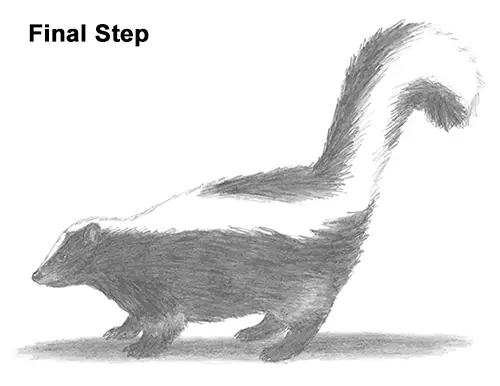
Finals Step: Add some shading to your drawing to give the skunk its distinct striped look. Add the value by using strokes that go in the general direction of the fur. Outline the shape of the stripes along the back using a series of quick, short strokes to represent fur.
Striped skunks usually have two stripes across the back. The second stripe is on the other side of the body and not visible from this angle. Skunks' coats are pretty dark, so push hard on your pencil as you add the value to the body. Be careful not to shade the stripe. Shading can be quite time-consuming, so be patient and take breaks as you add the dark value.
Continue shading until the entire body (except the stripe) is covered in a dark value. Sometimes striped skunks have lighter fur on their feet, so you can add a lighter value here by pushing softer on your pencil. It's always a good idea to use reference for a more accurate drawing.
Add a cast shadow underneath. This helps ground the skunk so it doesn't appear to be floating. Don't forget to pause the "How to Draw a Skunk" video to follow at your own pace.
Thanks for watching! Subscribe to the How2DrawAnimals YouTube Channel for a new tutorial every Tuesday.
To learn how to draw popular cartoon characters, visit EasyDrawingTutorials.com.


