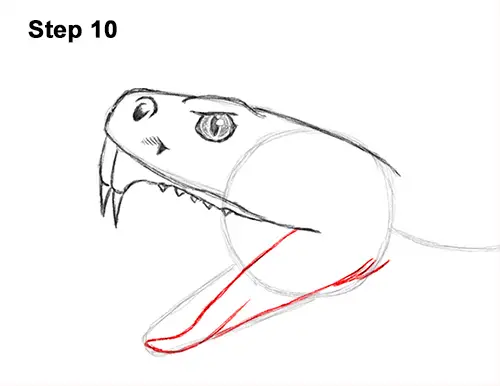
Step 10: Draw the rattlesnake's lower jaw using the arc at the bottom as a guide. Follow the basic path of the guide but make the shape curvier as you darken the lines.
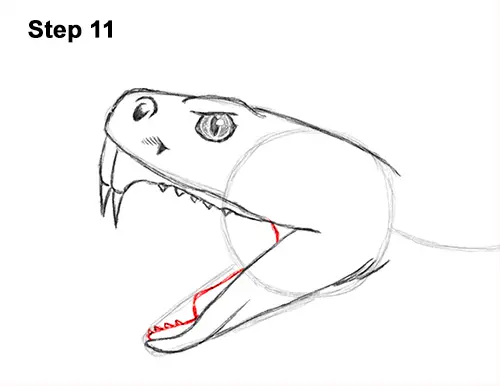
Step 11: Add the rattlesnake's gums and teeth above the top line using a series of curved lines.
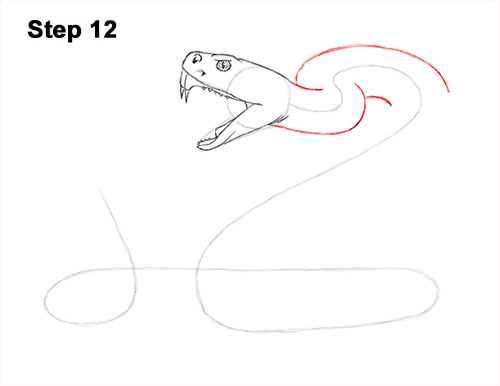
Step 12: Use the initial curved line as a guide to draw the top part of the rattlesnake's body. Follow the basic path of the guides as you darken the lines and make the shape thicker. The top of the body should curve away from the snake's head and act like a spring ready to strike. Sketch lightly at first, then darken the lines when you get the shape right.
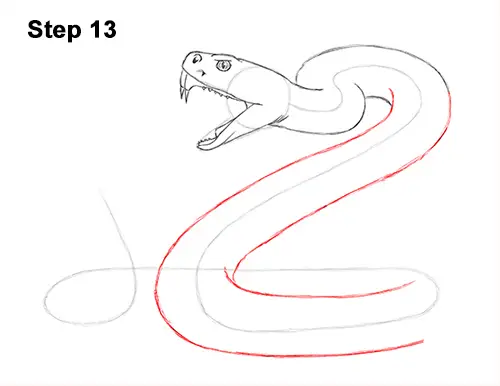
Step 13: Continue adding the middle section of the rattlesnake's body by using the initial line as a guide. Pick up where you left off and extend the lines that make up the body farther down as you follow the path of the guide. Make the shape of the snake's body thicker the closer you get to the middle at the bottom. Sketch the shape lightly at first and only darken the lines when you get the structure right.
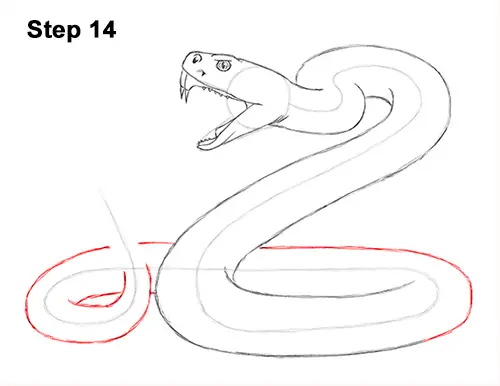
Step 14: Finish the rattlesnake's body by using the initial guide to draw the bottom part of the rattlesnake. The lower part of the body curves back behind the middle section, so make sure these lines don't overlap. Leave a small section open on the line at the top close to the tip of the tail because this is where the rattle will go.


