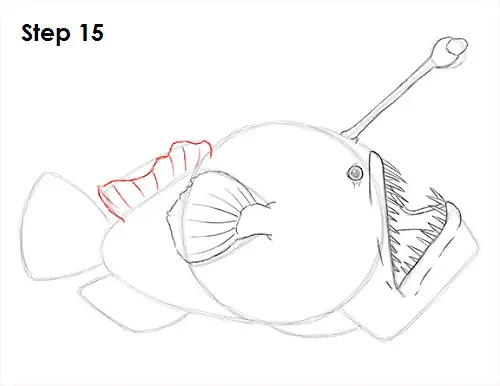
Step 15: Use the shape on top of the anglerfish's body as a guide to draw the dorsal fin. Make it wavier and add some lines inside.
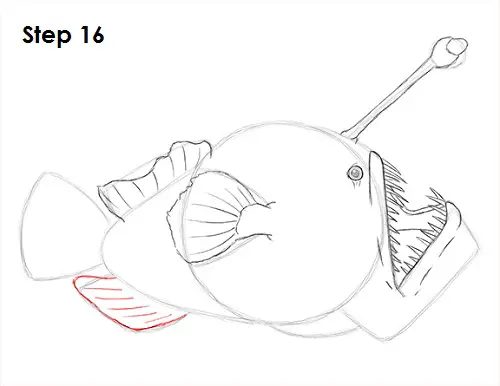
Step 16: Use the shape at the bottom to draw the pelvic fin the same as the dorsal fin.
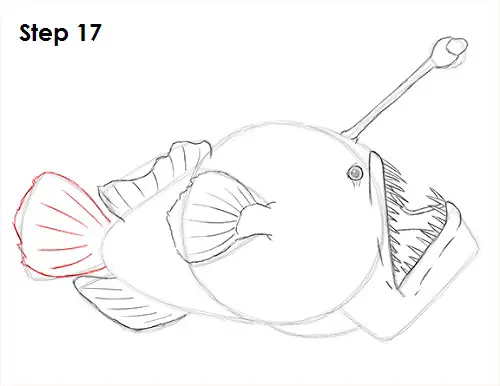
Step 17: Draw the anglerfish's tail by using the shape on the left as a guide. Make the tail wavier and add some lines inside.
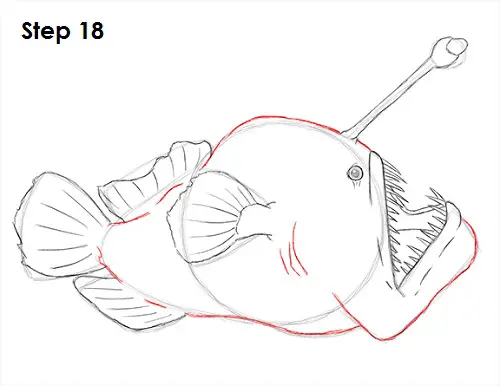
Step 18: Use the remaining lines and shapes as guides to draw the rest of the anglerfish's head and body. Follow the basic path of the guides as you darken the lines and form the shape of the head and body. Add a few curved lines inside the head to the left of the anglerfish's mouth for the gills.
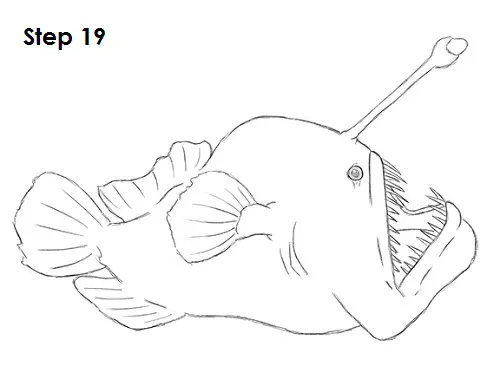
Step 19 (optional): For a cleaner look, erase as much as you can of the initial guide lines. Don't worry about erasing all of the guides. It's okay to leave some behind. Re-draw any final sketch lines that you may have accidentally erased.
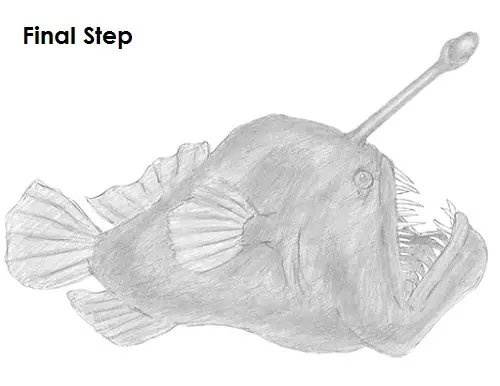
Final Step (optional): Add some shading to your anglerfish drawing to give it more dimension and volume. Add the value lightly at first, then gradually build up to the level of darkness that you want. Don't worry too much about the shading if you're going to add more value on the next step.
You can add even more value throughout your anglerfish drawing for extra detail. Anglerfish don't have any patterns on their bodies, so just add a single even value to everything. Continue adding the value until the whole body is covered. Shading can be time-consuming, so be patient and take breaks. Add a lighter value than the body to the fins because they're fairly transparent. When shading the lure, use a very light value in the middle of the base and at the tip for a glowing effect. Remember to pause the "How to Draw an Anglerfish" video after each step to draw at your own pace.
Thanks for visiting! Subscribe to the How2DrawAnimals YouTube Channel for a new tutorial every Saturday.
To learn how to draw popular cartoon characters, visit EasyDrawingTutorials.com.
RELATED TUTORIALS
 |
 |
 |


