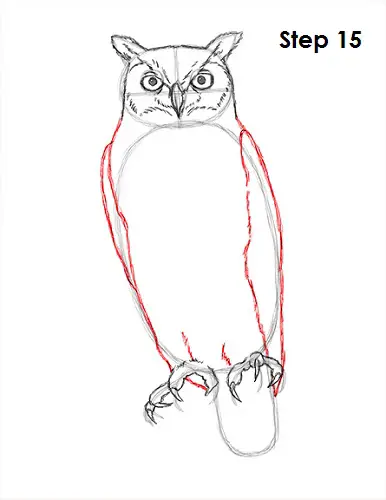
Step 15: Draw the rest of the owl's body using the big oval as a guide. Draw a curved line along the left side of the owl's body for the wing. Do the same thing on the right side, but have the line overlap the body and go down toward the owl's tail.
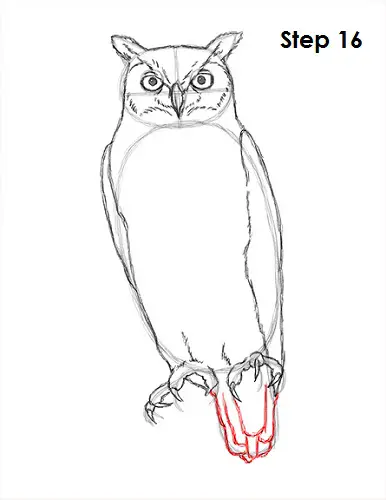
Step 16: Draw the owl's tail feathers using the U-shaped line as a guide. Simply draw smaller, thinner U-shaped lines within the bigger shape to represent feathers.
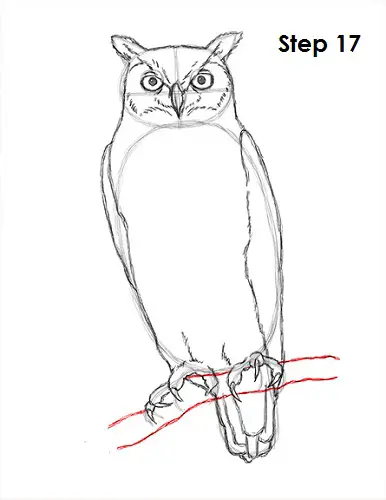
Step 17 (optional): Draw something at its feet, like a rock or a ledge so the owl doesn't appear to be floating. Two lines work as a branch.
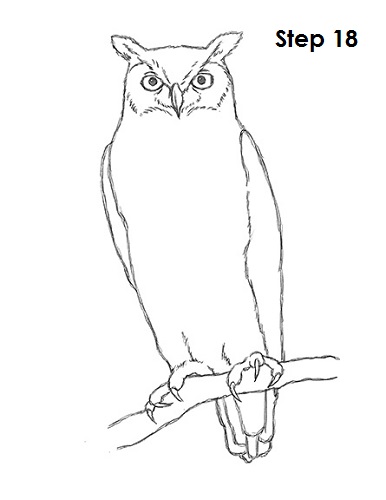
Step 18 (optional): For a cleaner look, erase as much as you can of the initial guide lines. Don't worry about erasing all of them. It's okay to leave some behind. Also re-draw any final sketch lines you may have accidentally erased.
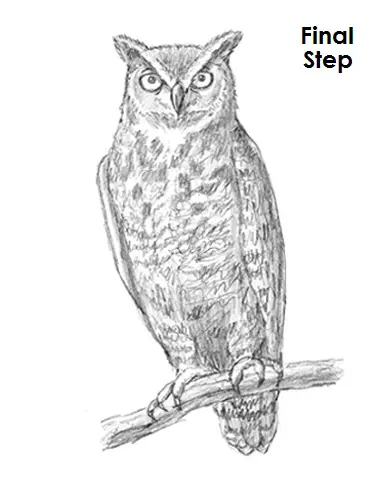
Final Step (optional): Add some shading to give your owl drawing more dimension and volume. Pick the direction of the light source when shading so that the shadows are consistent with it. Vary the pressure on your pencil to get different degrees of tonal value.
You can add more value throughout your owl drawing for extra detail. Remember to pause the video or use reference for accuracy when shading the pattern of the owl's feathers. It looks a lot more intricate than it actually is. The pattern basically consists of spots of different sizes and small squiggly lines.
Thanks for visiting! Subscribe to the How2DrawAnimals YouTube Channel for a new tutorial every week.
To learn how to draw popular cartoon characters, visit EasyDrawingTutorials.com.
To learn how to draw Manga, visit How2DrawManga.com.
RELATED TUTORIALS
 |
 |
 |


