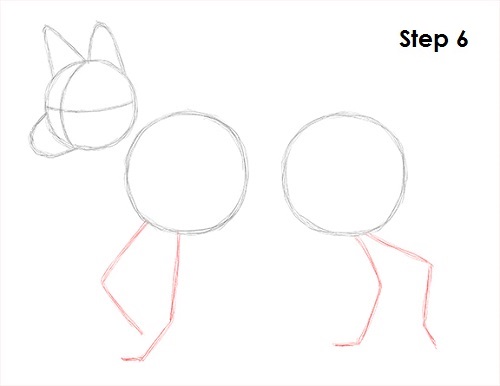
Step 6: Draw four lines under the coyote's body (two below each circle) as guides for the legs. The coyote will be moving forward with mid-stride, so pay attention to the shape of the guide lines. Bend the lines to indicate where the joints and feet will be.
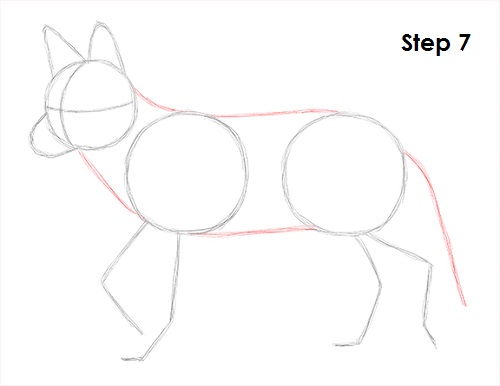
Step 7: Draw a series of lines that connect the major shapes to form the rest of the coyote's body. Two lines in the front form the neck and two more in the middle form the torso. Add another line on the right side as a guide for the tail.
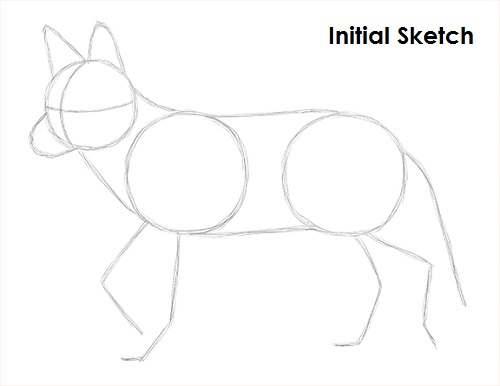
That's it for the initial sketch! From this point on, press harder with your pencil to get a more defined sketch.
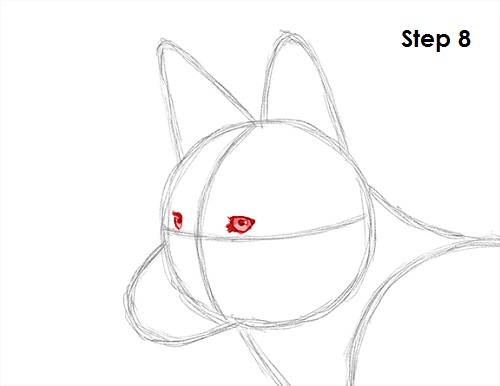
Step 8: Lightly sketch the coyote's eyes inside the head using the lines as guides for placement. Darken the outline for the eyes once you get the placement and shape right. Make the outlines of the eyes thicker to give the eyes a darker edge. Add a small dot inside each eye for the pupils. Shade the inside of the eye using a value that's lighter than the pupils. Don't shade a tiny circle inside each eye to represent glare.
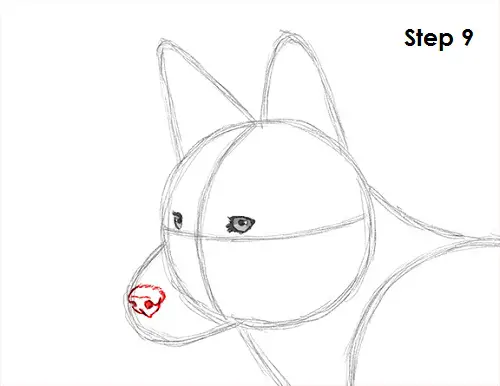
Step 9: Draw the nose on the tip of the arc on the left side. First lightly sketch a circle at the tip of the coyote's muzzle. Then darken the edges by following the path of the circle and adding the nostrils as you go along. Make the bottom of the nose pointier and add a small line too. Use a few quick, short strokes at the top to represent fur.


