Page 3 of 4
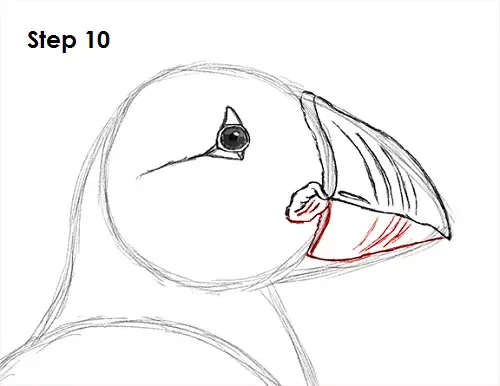
Step 10: Now draw the lower part of the beak the same way. Use the triangle-like shape as a guide and add the fleshy part, the base and the detail within the puffin's beak.
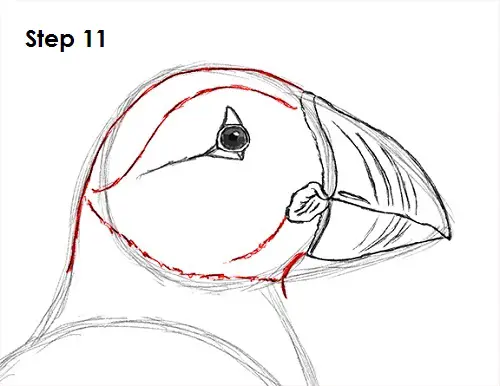
Step 11: Use the initial circle as a guide to draw the rest of the puffin's head. Follow the path of the circle as you darken the lines to create the head. Draw a couple of lines within the head using quick, short strokes to indicate the color separation of the feathers.
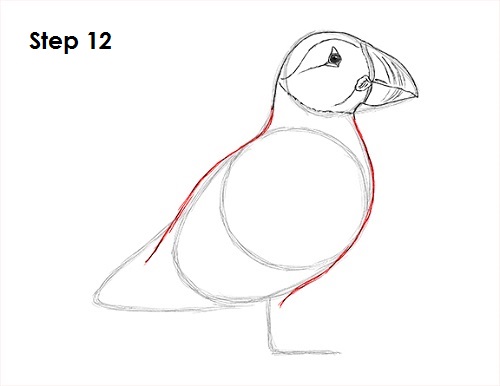
Step 12: Use the initial shapes as guides to draw the puffin's body. Follow the path created by the egg shape and darken the lines to create the body.
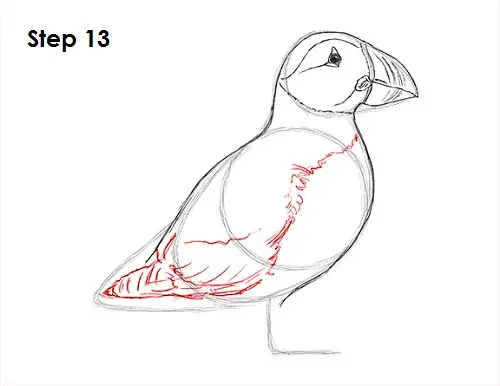
Step 13: Draw the puffin's the wing inside the shape of the body using a series of curved lines. The line to create the edge of the folded wing should be pretty parallel to the line for the lower body and tail. Inside the shape of the wing, draw a series of curved lines for the detail on the individual feathers. Draw a line consisting of quick, short strokes above the chest to indicate the feather color separation.
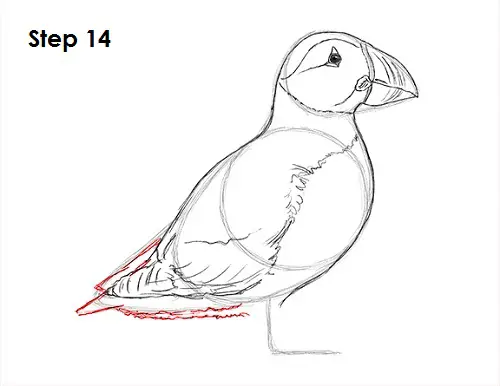
Step 14: Use the triangle-like shape on the lower left side as a guide to draw the puffin's tail. Use a thin arc for the wing on the other side and for the tail. Draw the bird's feathers underneath using curved lines.


