Page 3 of 4
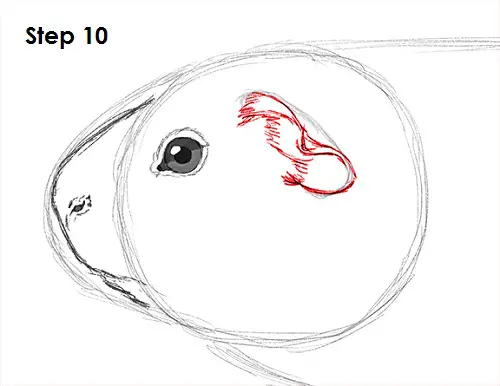
Step 10: Use the C-shaped line on the right as a guide to draw the guinea pig's ear. Use a series of curved lines to flesh out the inner and outer ear structure as you follow the path of the guide. Use quick, short strokes for the fur around the base for the ear.
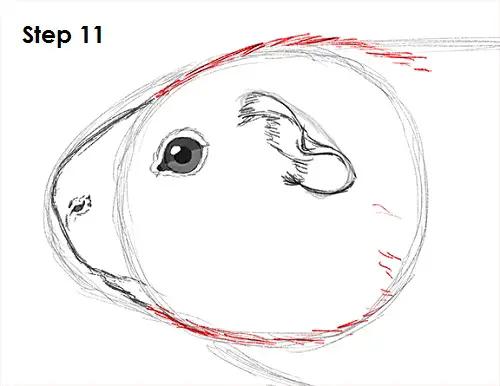
Step 11: Use the original circle as a guide to draw the rest of the guinea pig's head. Use quick, short strokes as you follow the edge of the circle.
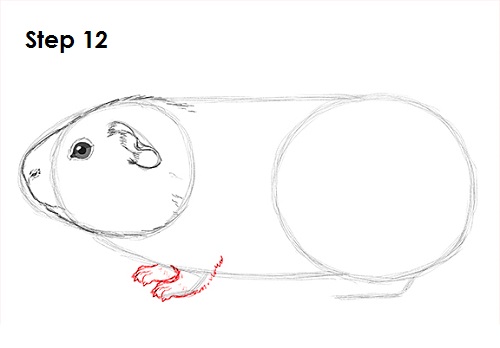
Step 12: Use the line on the left as a guide to draw the guinea pig's front feet. Lightly sketch the shape of the leg as you follow the path of the line. When you get the structure of the leg right, darken the lines using quick, short strokes. Draw a few curved lines at the tip for the toes. At the end of the toes, draw tiny angled lines for the guinea pig's nails. Draw the front foot on the other side the same way. Most of it is hiding behind the body, so only draw the toes and nails.
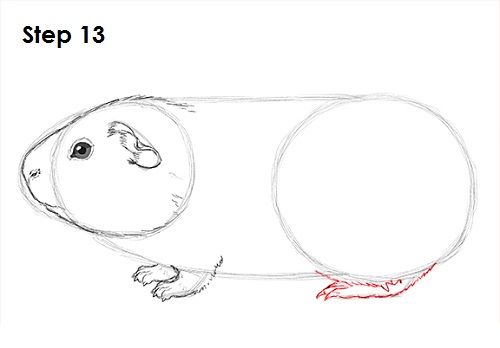
Step 13: Use the line on the right as a guide to draw the guinea pig's hind leg. Draw the top part of the leg by following the bottom part of the circle and adding quick, short strokes as you go along. Draw the guinea pig's toes and nails at the tip. The hind leg on the other side is completely hidden by the body.
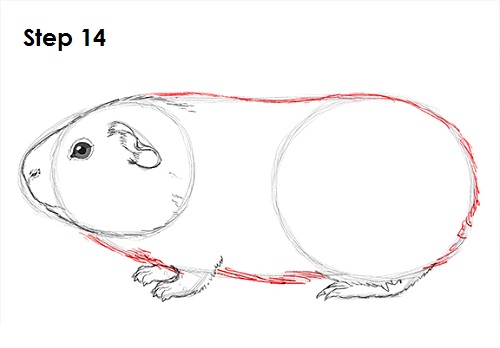
Step 14: Use the remaining lines as guides to draw the rest of the guinea pig's body. Simply darken the guide lines to create the top part of the body. Some guinea pigs have longer hair. You can use longer strokes throughout the body for this guinea pig variation. Use quick, short strokes at the bottom for a shaggier look underneath.


