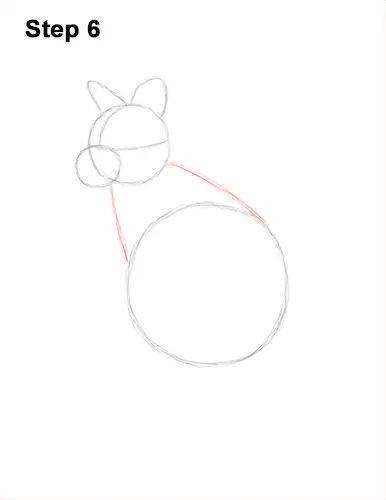
Step 6: Draw two curved lines that connect the first two circles to complete the guide for the wallaby's body. This shape should be narrow at the top and wide at the bottom.
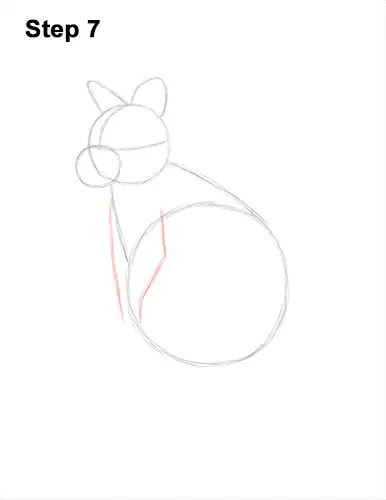
Step 7: Below the head, draw two long vertical lines as guides for the wallaby's arms. The arm on the right should bend slightly to the left , and the arm on the left should bend slightly to the right.
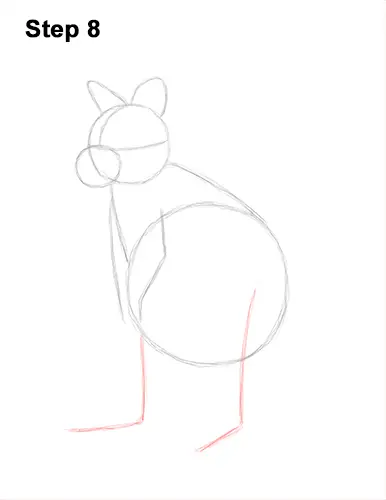
Step 8: Under the body, draw two long lines that bend toward the left at the bottom as guides for the legs. These lines should be similar to a backward letter L. Pay attention to their length in relation to the wallaby's body.
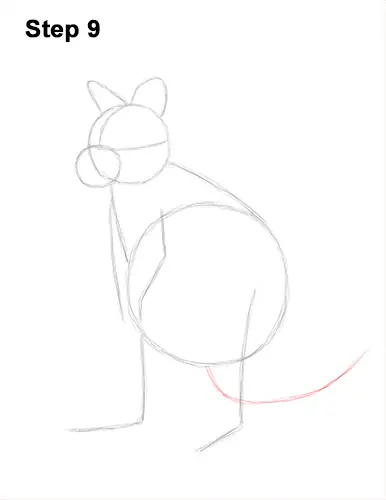
Step 9: Under the body, draw a line that curves to the right as a guide for the wallaby's tail. It's okay if this line overlaps the guide for the leg on the right a bit.
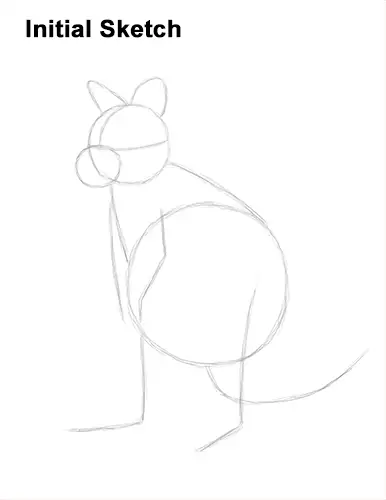
That's it for the guides! From this point on, press harder with your pencil for a more defined drawing.


