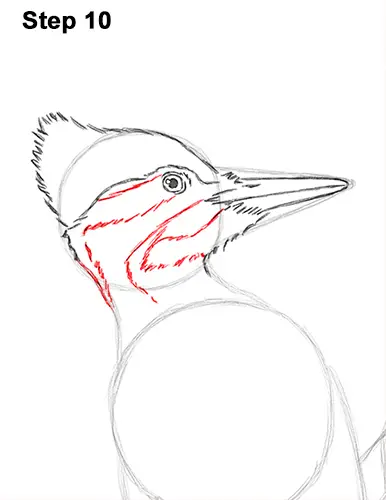
Step 10: Add the striped pattern in the woodpecker's head using a series of quick, short strokes. First add the stripe to the left of the eye that curves down toward the back of the head on the left. Now draw another line that starts at the beak and curves to the left and down toward the neck. Finally add a couple of lines under the beak that curve to the right toward the throat.
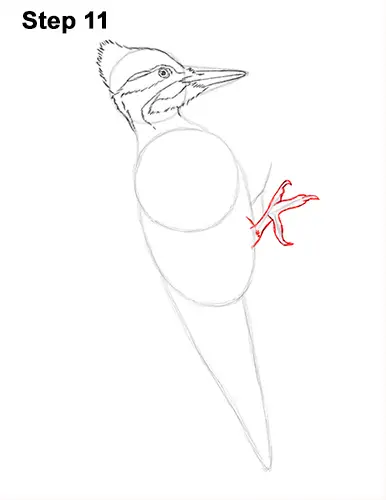
Step 11: Use the initial K-shaped line as a guide to draw the woodpecker's foot that's on this side of the body. Follow the basic path of the guide as you make the shape of the foot and toes thicker. Add the claws at the end using short, curved lines.
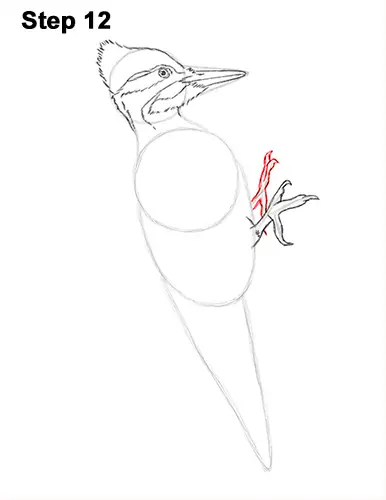
Step 12: Use the other set of lines as a guide to draw the woodpecker's other foot. Make the toes thicker and add the claws. Part of the foot is behind the foot on this side, so try to not overlap the lines.
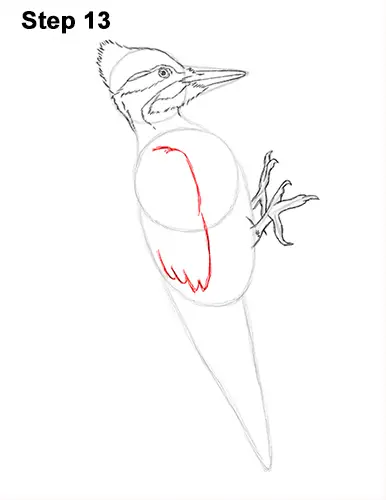
Step 13: Draw the top portion of the woodpecker's wing using a series of curved lines inside the body. Draw the shape lightly at first to get the placement right. This portion of the wing should be as long as the body.
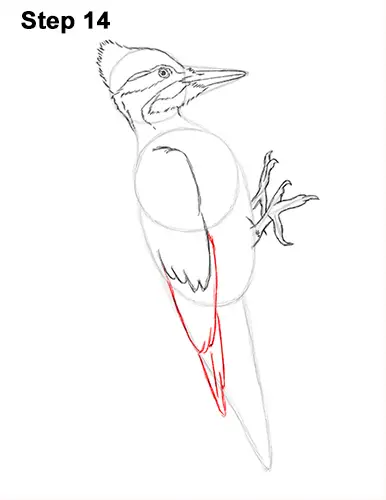
Step 14: Now draw the lower portion of the woodpecker's folded wing using more curved lines. First draw a thin arc below the first portion of the wing. Then add an even thinner arc for the tip of the wing.


